Introductions
Introductions
Sell USDT
Auto-withdrawal
Withdrawal Approval
Resend Webhook
Risky Address Management
Invite Member
Withdrawal Approval
16 Apr. 2025 15:46
The Withdrawal Approval feature on CCPayment allows you to manage and approve pending withdrawals efficiently. By configuring this feature, you can ensure better control over your withdrawals and protect your funds. This guide will help you navigate and use the feature for smooth processing.
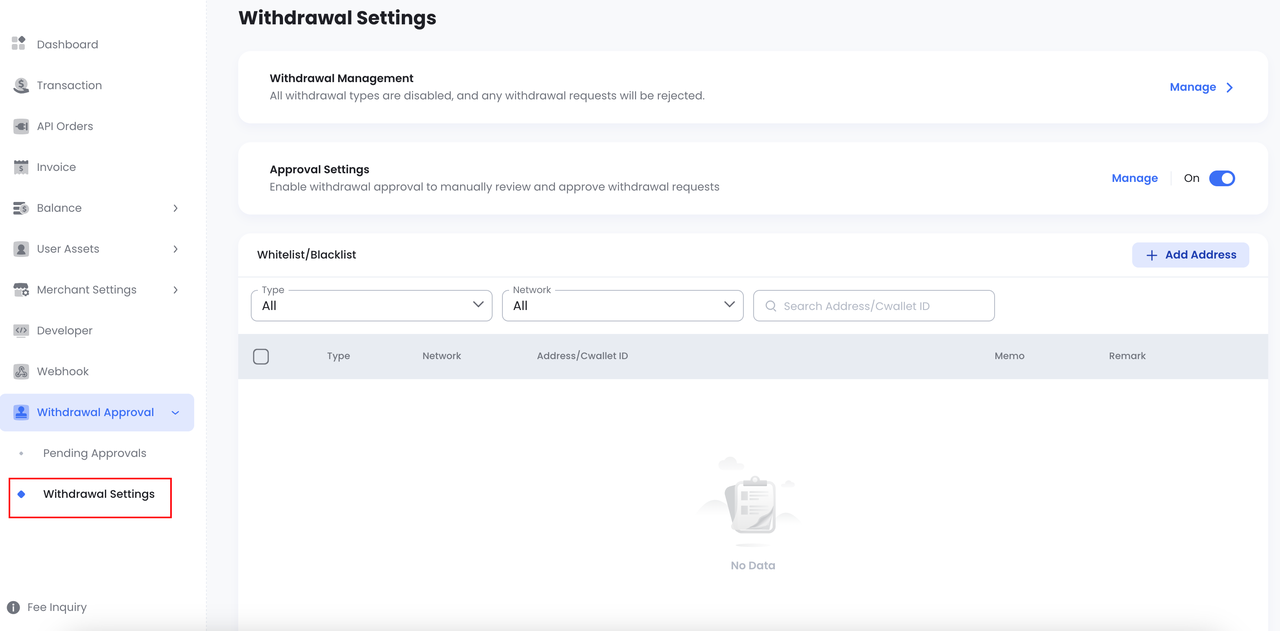
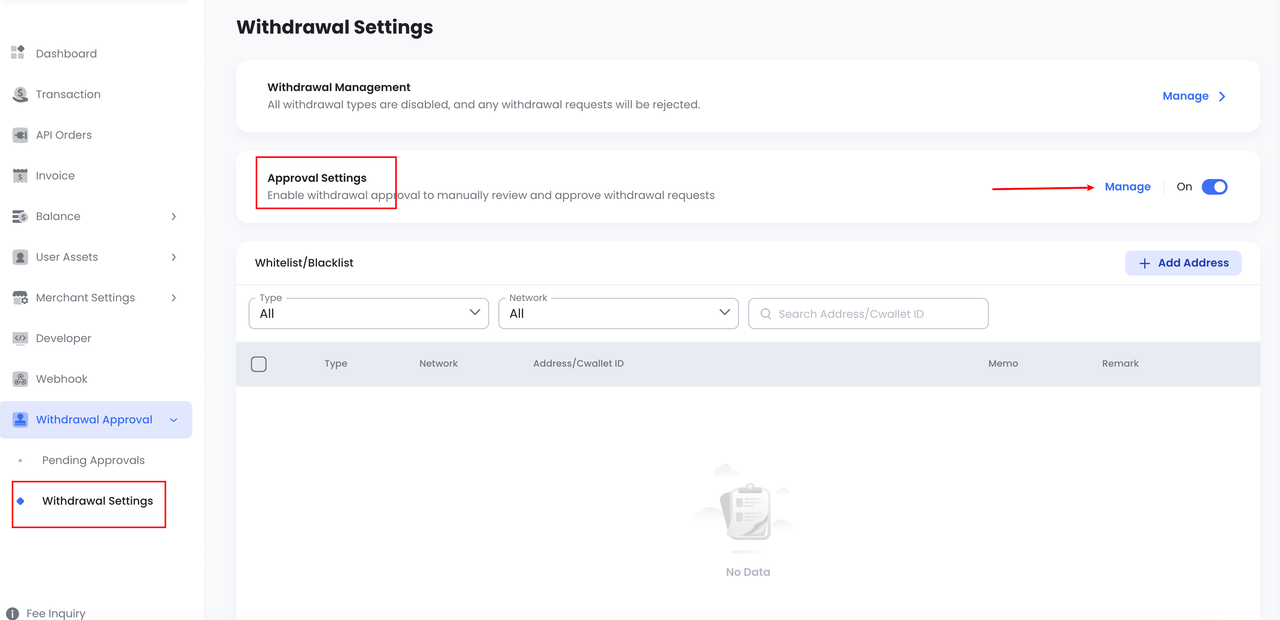
Step 1: Access the Withdrawal Approval Section
Log in to "CCPayment" > navigate to the "Withdrawal Approval" section > look for "Withdrawal Settings". Here to configure your withdrawal approval.
Step 2: Configure Withdrawal Approval
- 1. Types of withdrawals can be configured.In the Withdrawal Management Section: By default, all withdrawal types are enabled. You can untick the boxes for any withdrawal type you don't wish to apply for approval. For instance, if you need to disable API Withdrawals in emergencies, simply deselect "API Withdrawal". Once deselected, all withdrawals of this type will be rejected, ensuring they do not go through.
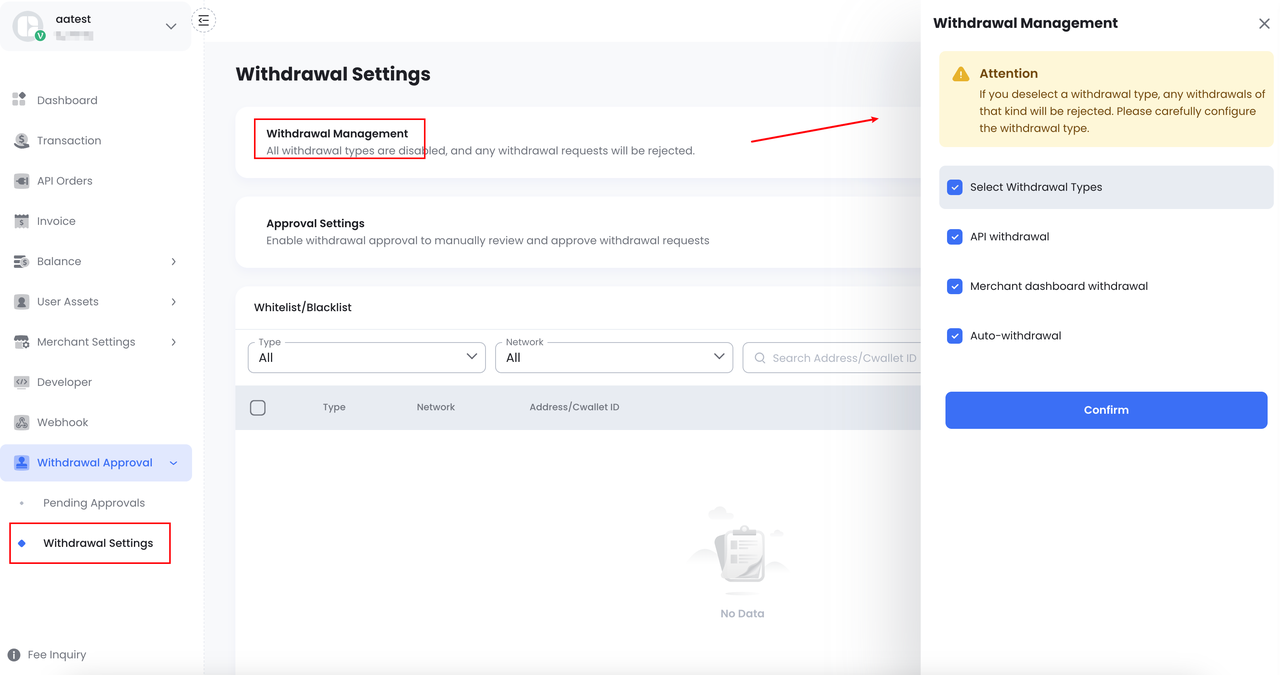 Note: Withdrawals of risky funds do not require approval.
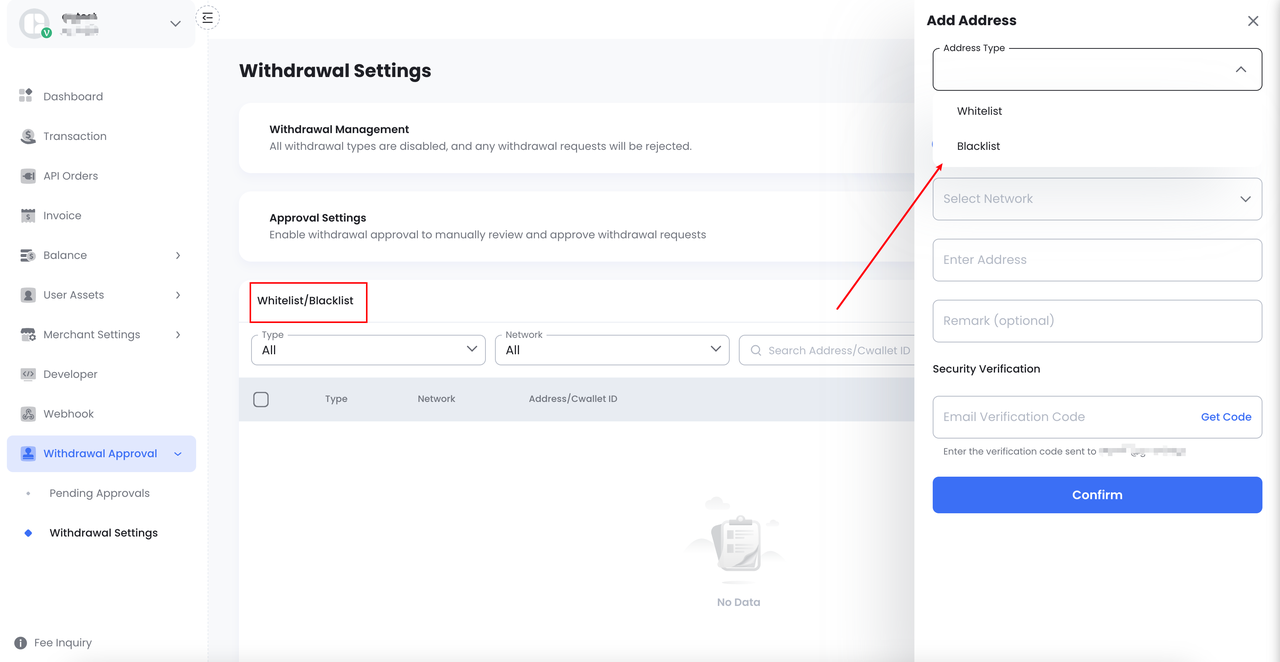
 - 2. Using Whitelist/Blacklist:Locate to "Withdrawal Settings" > "Whitelist/Blacklist" section, you can also configure specific addresses as whitelisted or blacklisted for withdrawals. This ensures that only trusted addresses are allowed for withdrawals, while suspicious or risky addresses are blocked automatically.
- Whitelist: Withdrawal to whitelisted addresses/accounts does not require withdrawal approval.
- Blacklist: Withdrawal to blacklisted addresses/accounts can not submit a withdrawal request.
- 3. Set Your Needed Withdrawal Type.By default, regular withdrawal approval is enabled. Withdrawals exceeding $10,000 require approval from the account owner.To customize this default setting, navigate to the "Approval Settings" section, and click "Manage" to start the configuration.
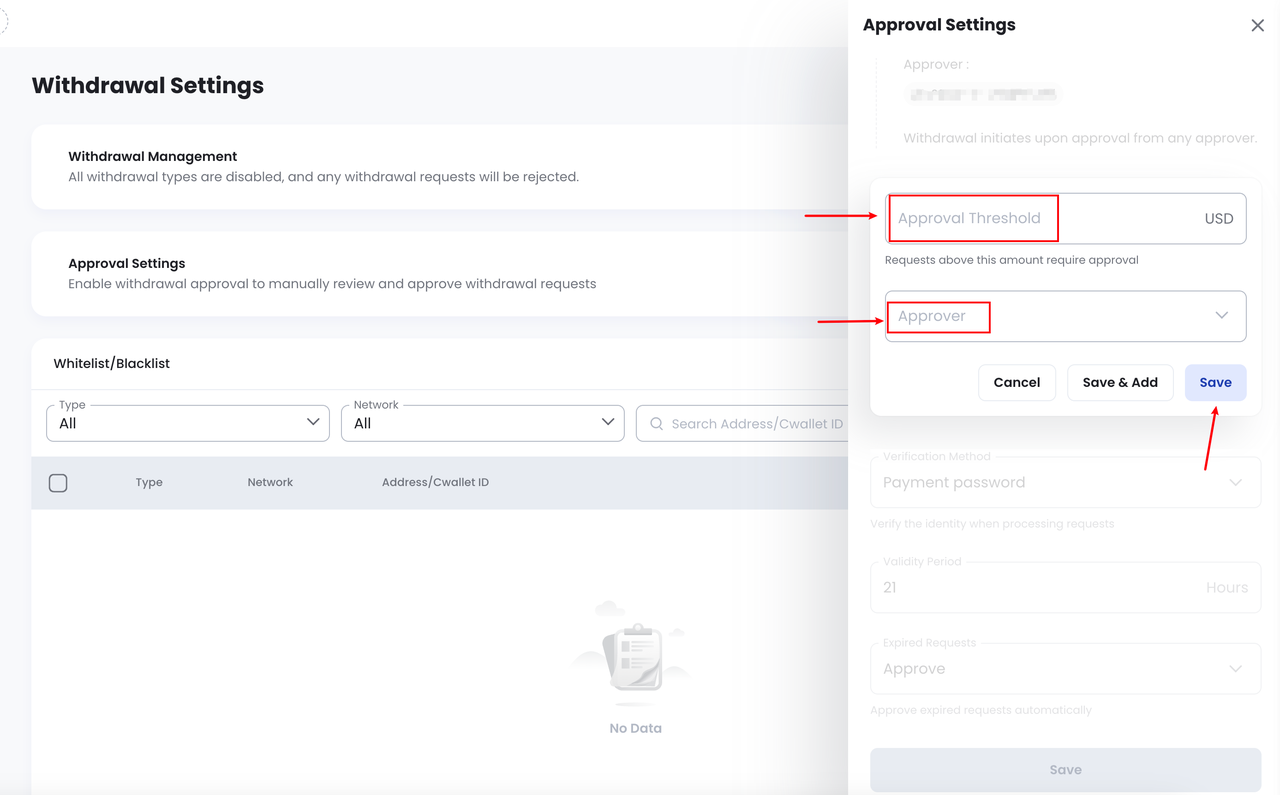
 You can select the withdrawal types you wish to configure. Then simply edit the withdrawal threshold, select the approver, adjust any additional options, and click "Save" to apply your changes.
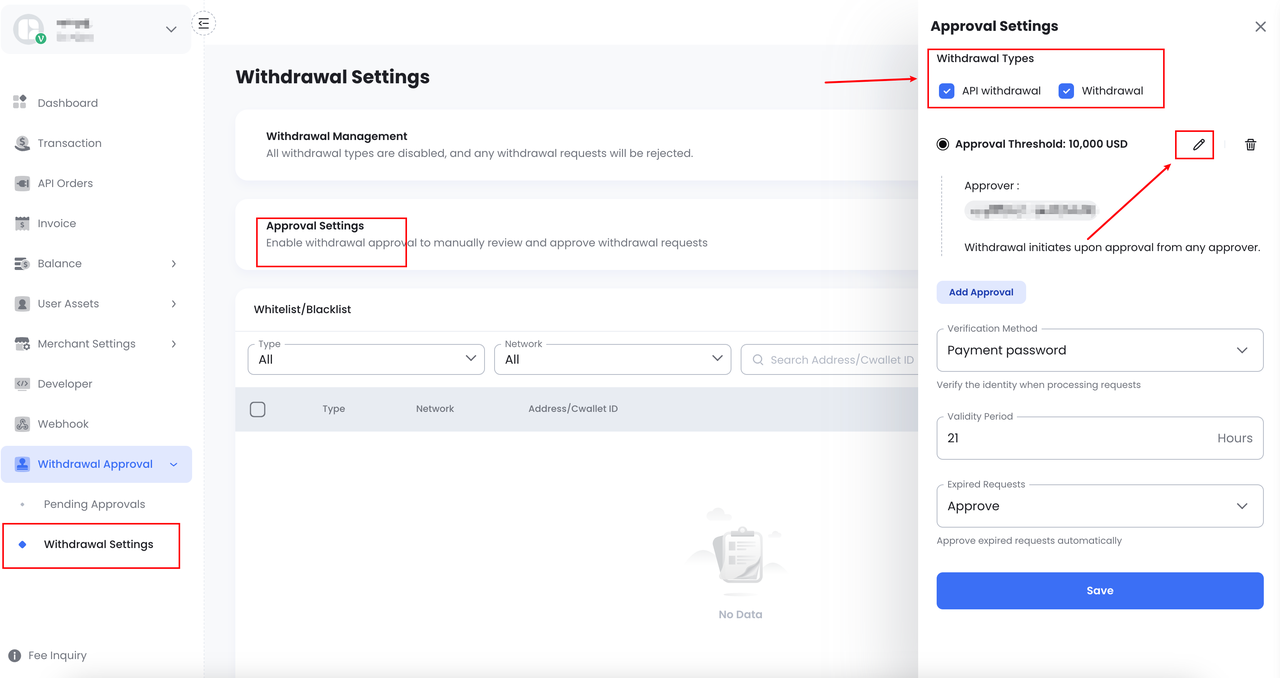
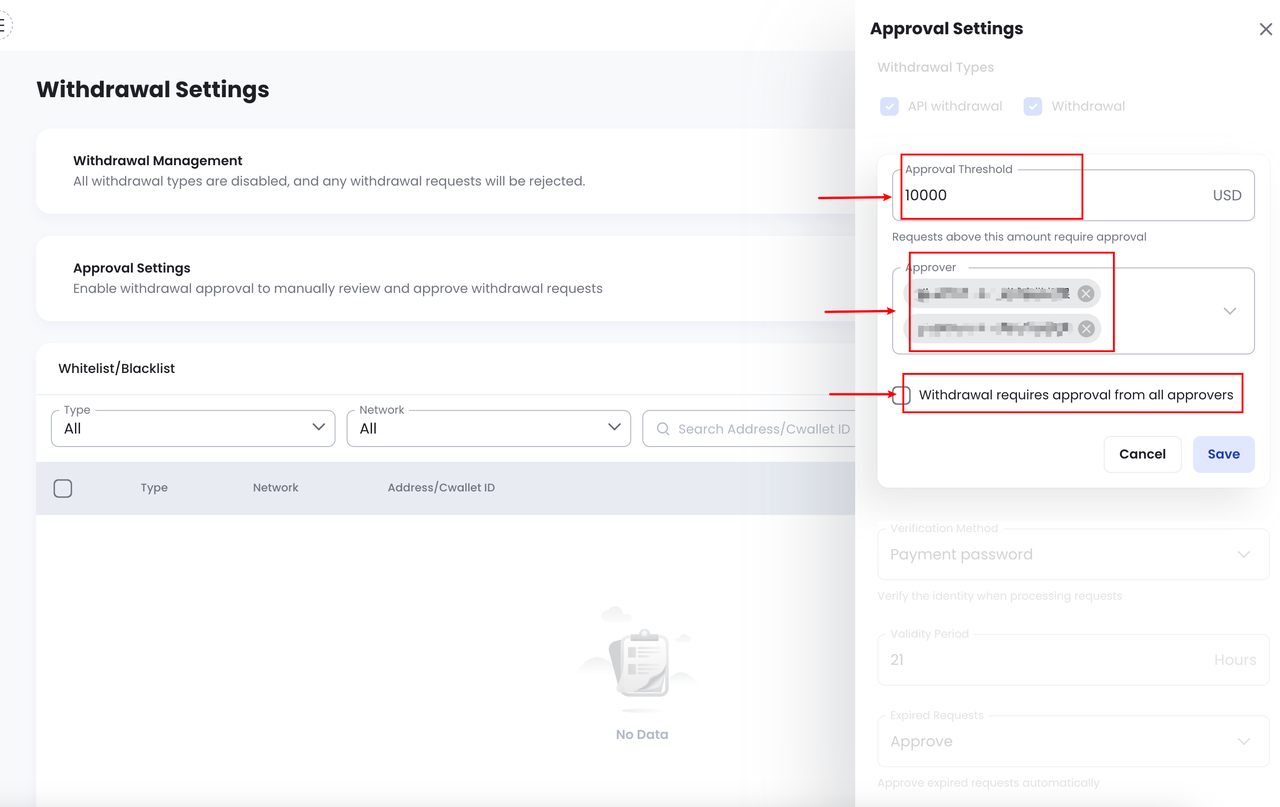
Note: Tick the "Withdrawal requires approval from all approvers" box if you want the withdrawal request finalized only after approval from all designated approvers.
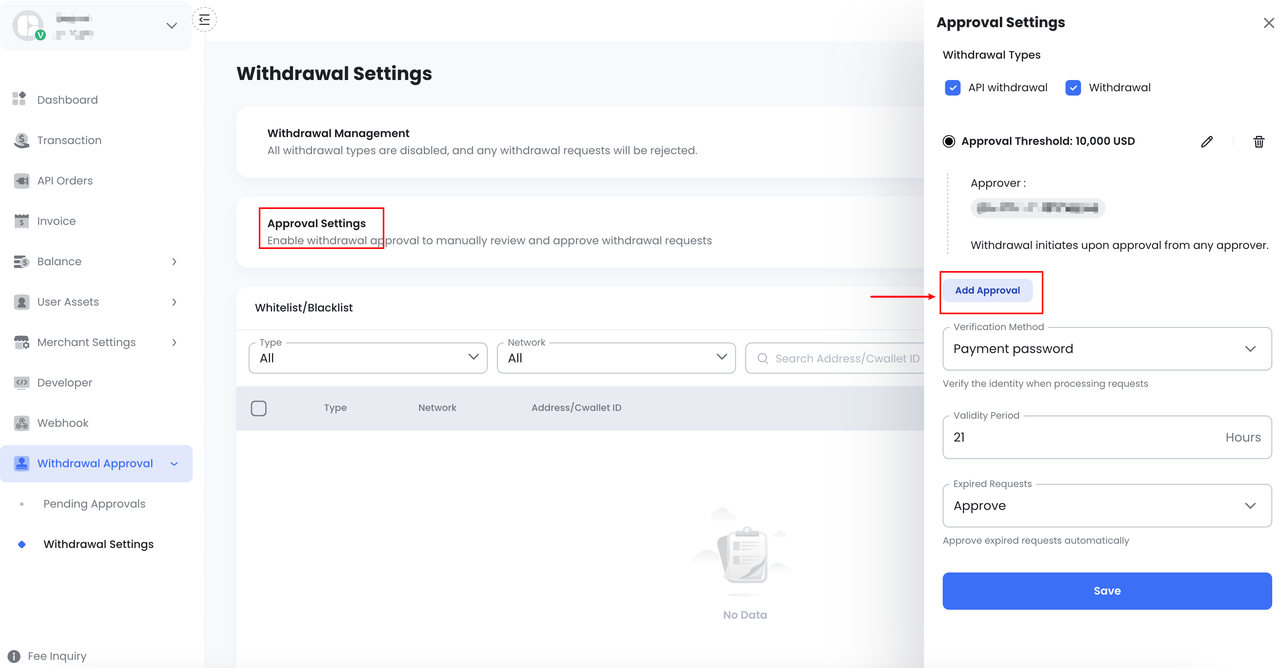
If you require withdrawals to be processed by multiple approvers, you can enable the advanced withdrawal feature. Follow the below instructions:
- 1. Click "Add Approval" to set the approval threshold and assign approvers.Only withdrawal amounts equal to or greater than this threshold amount require approval. Click "Save" to apply the changes.
- 2. Select the approval type: Amount-Based Approval or Tiered Approval.
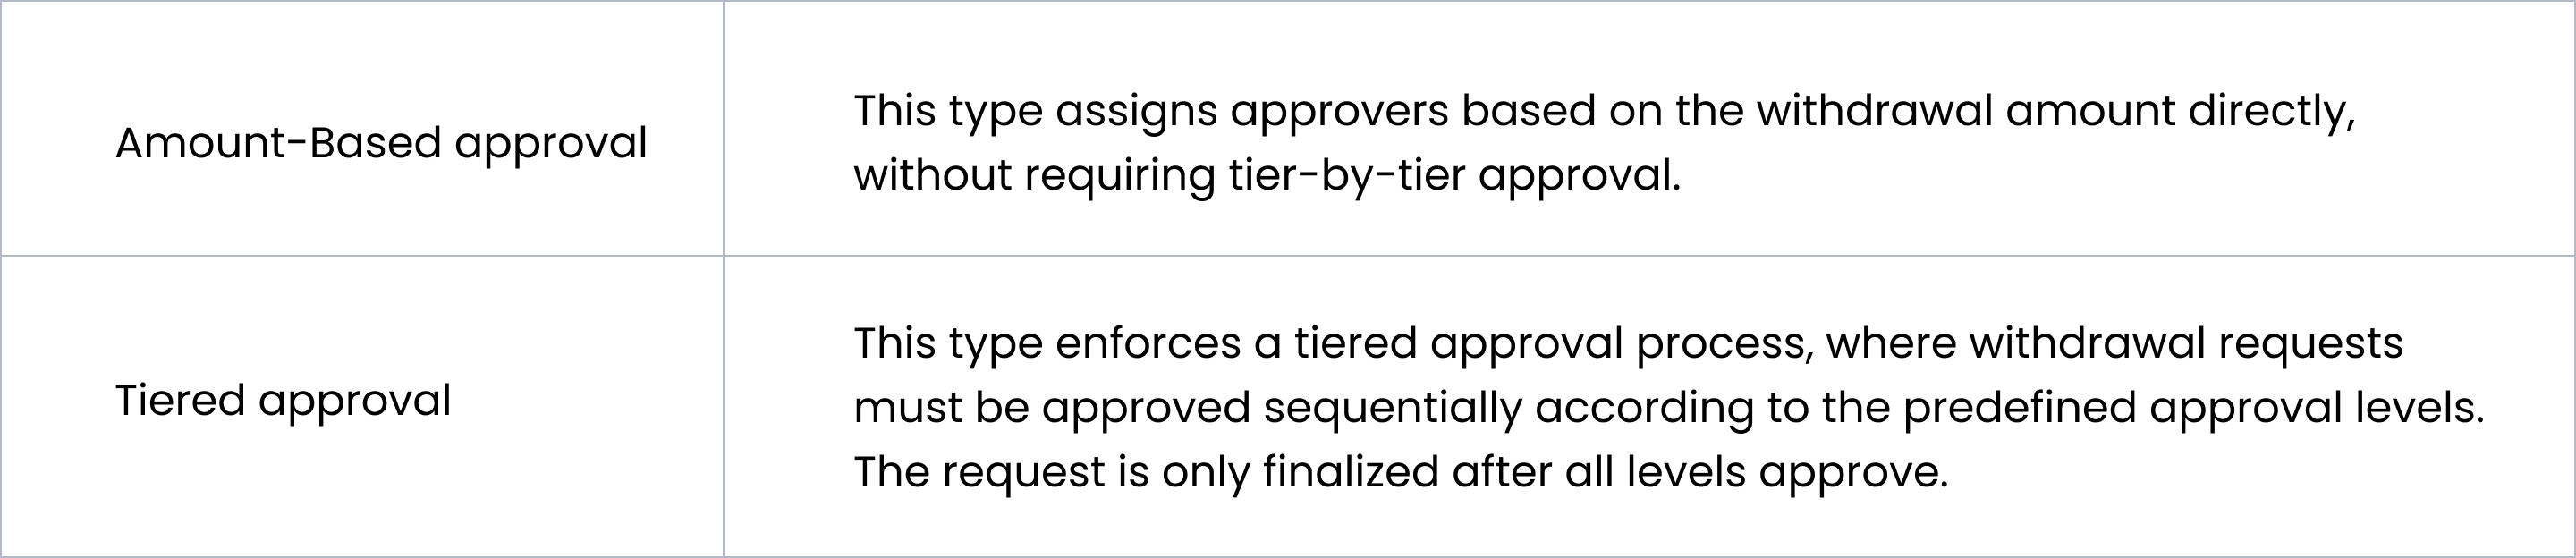
- Proceed with amount-based approval:Tick the "Amount Range-Based" box > Click "Add Approval" to add additional amount ranges with assigned approvers.You can define up to three ranges.Example:If you set up three amount ranges with designated approvers:
- $10000 - $15000: Approver A
- $15000 - $20000: Approver B
- $20000 and above: Approver C
A withdrawal request for $10000 - $15000 will only be reviewed by the approver A assigned to this range.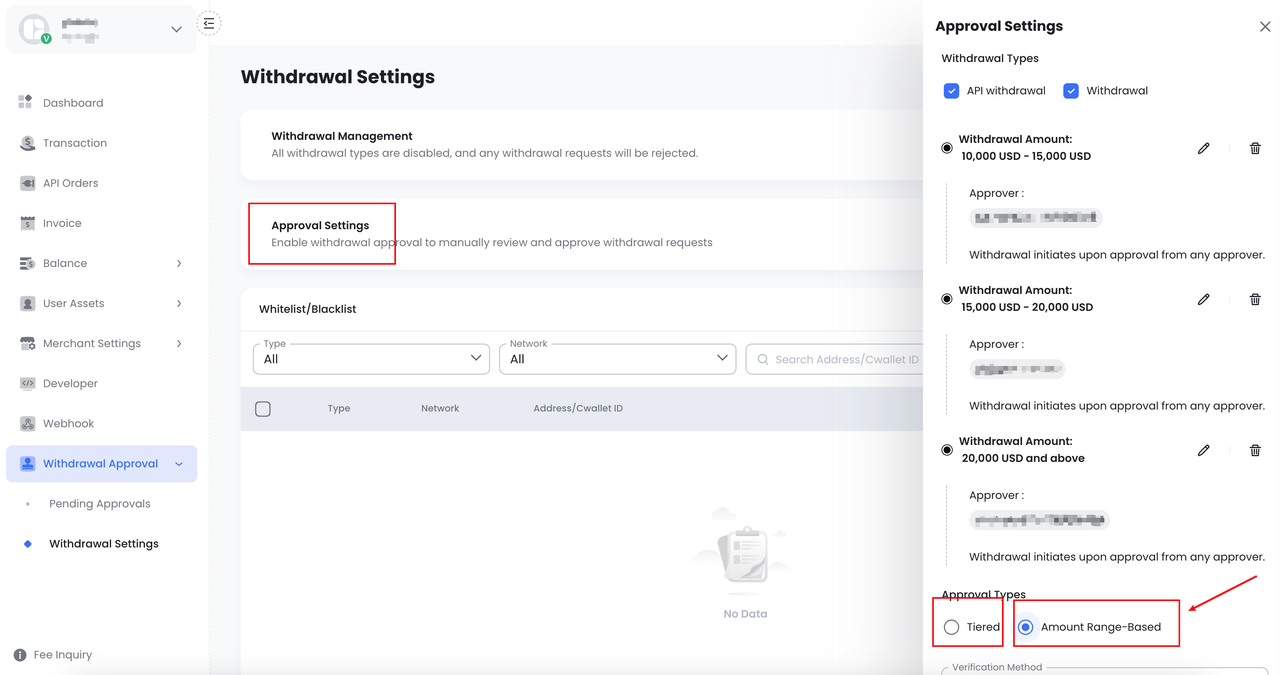
- Proceed with the Tiered approval:Tick the "Tiered" box > Click "Add Approval" to add another tier with the specified threshold and approver.You can define up to three approval tiers.Example:Suppose you have set up three approval tiers with designated approvers:
- Tier 1 $10000: Approver A
- Tier 2 $20000: Approver B
- Tier 3 $30000 and above: Approver C
A withdrawal of $10000 will be approved by Approver A only.A withdrawal of $20000 will need approval from both A and B, in order.A withdrawal of $30000 or more will require approval from all three tiers, in order.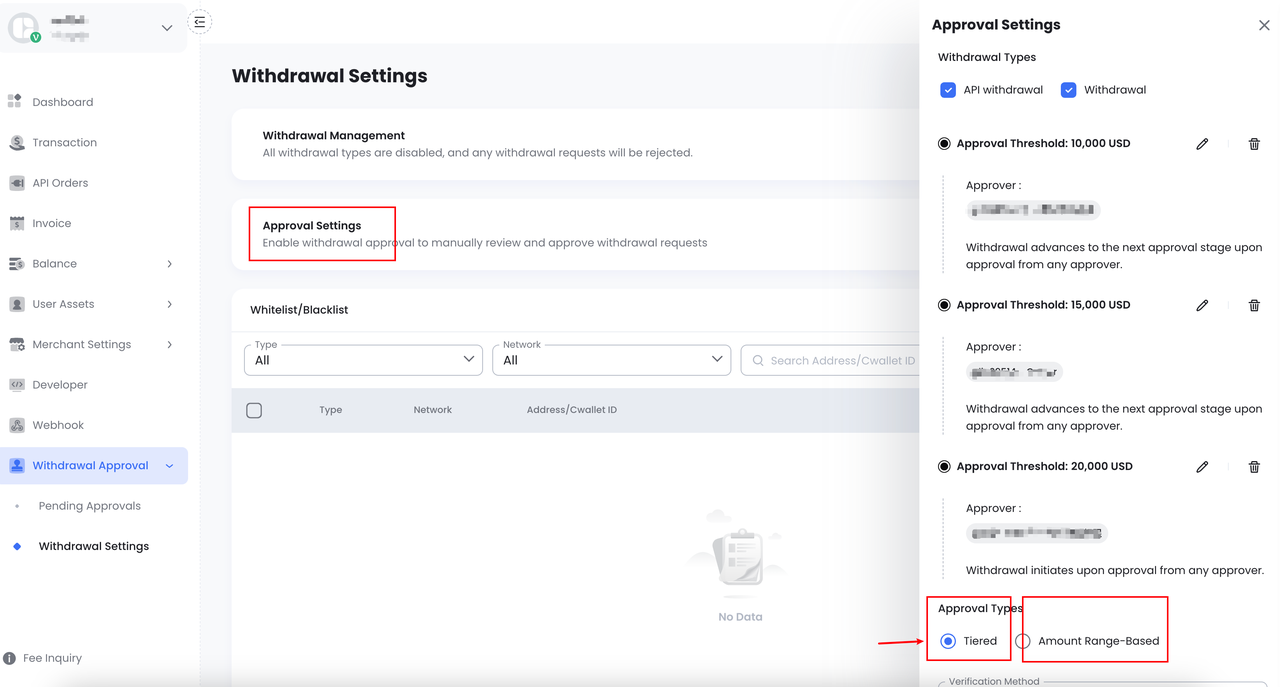
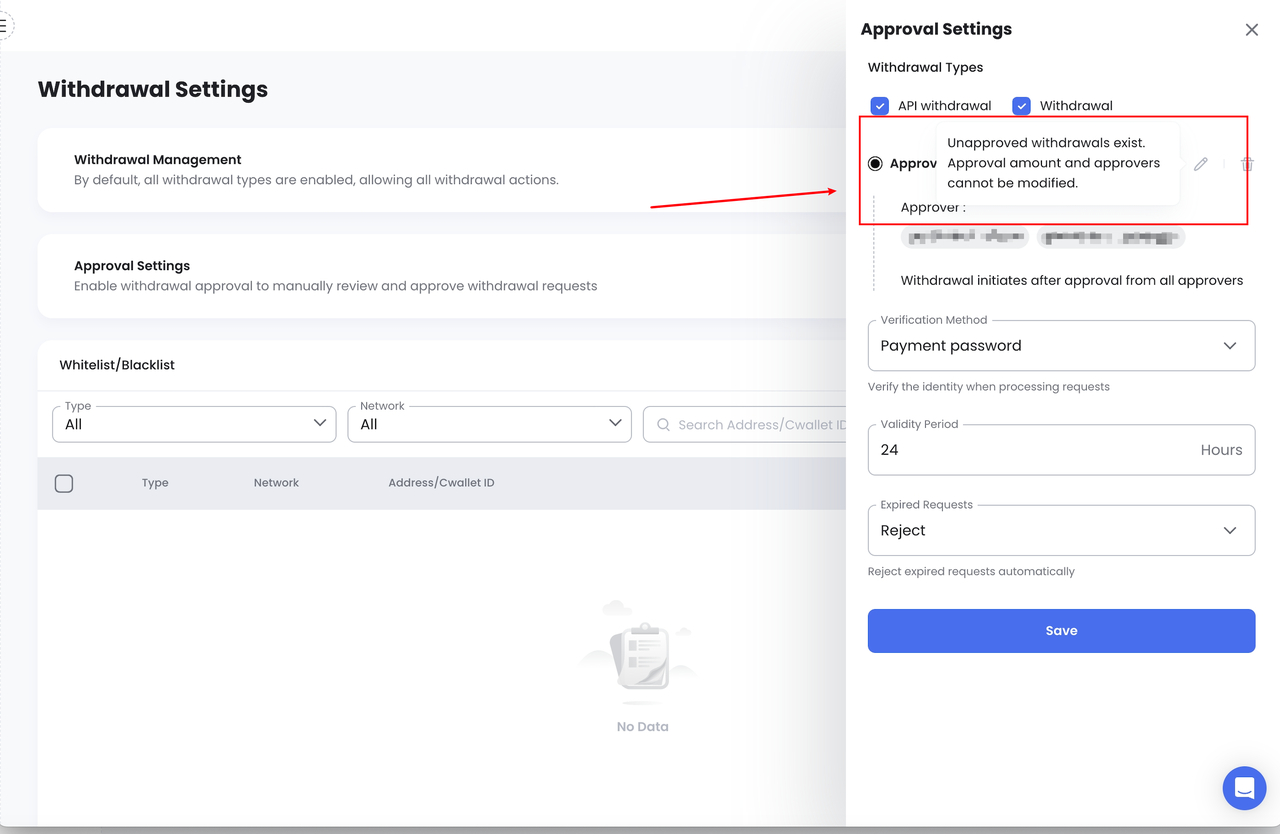
Step 3: Configure Verification Method & Request Validity & Expire Request
Verification method: To ensure a secure and smooth withdrawal, you can set up verification when processing requests.
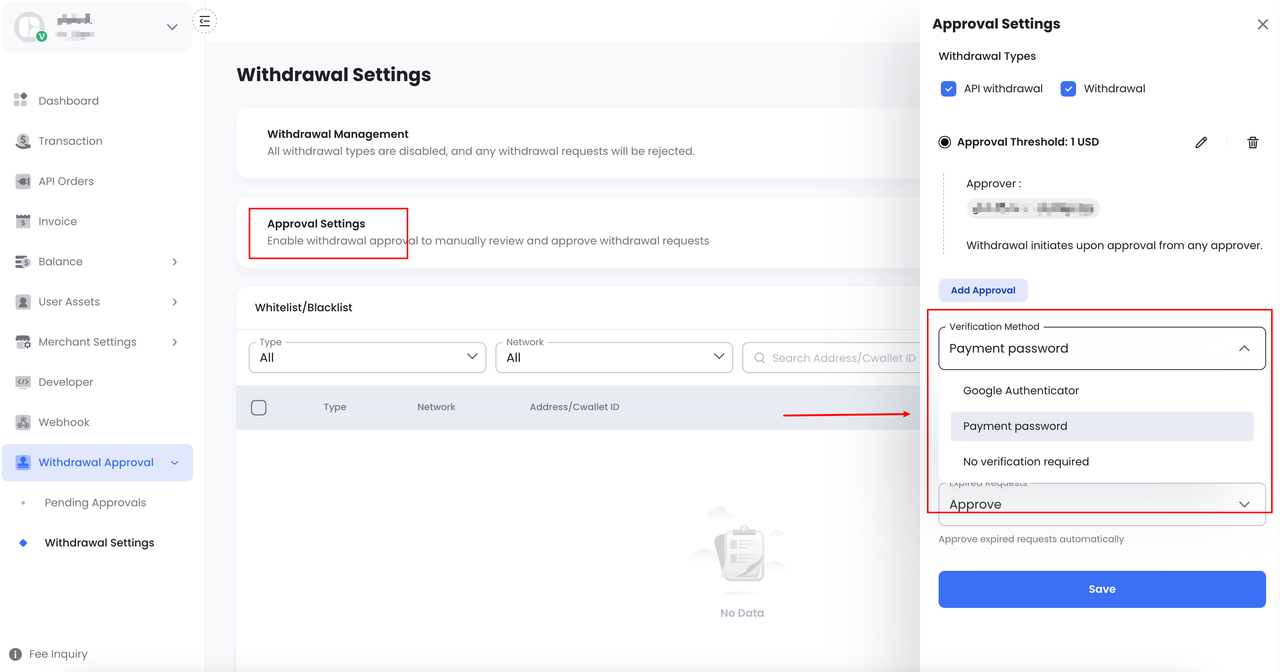
Request validity period: Click here to set the request validity period. Requests that exceed this time will be processed with the default action.
Expired requests: Expired requests will automatically be approved or rejected based on the settings you configure.
Note: If there is an unapproved withdrawal request, you cannot modify the settings.
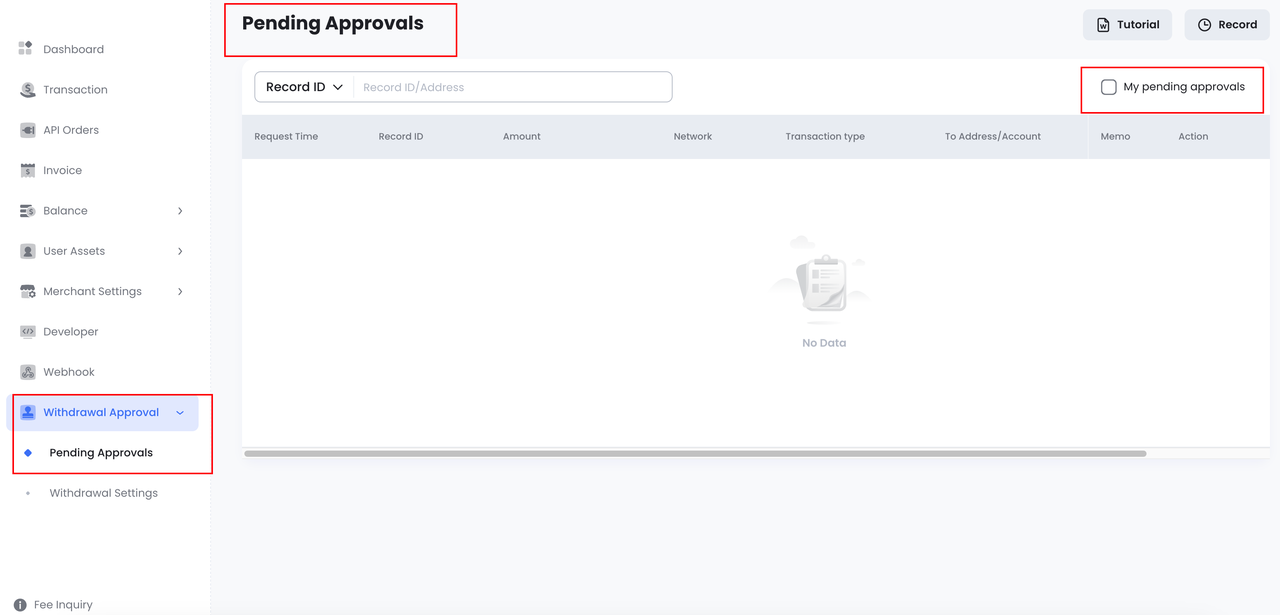
Step 4: Approving or Rejecting a Withdrawal Request
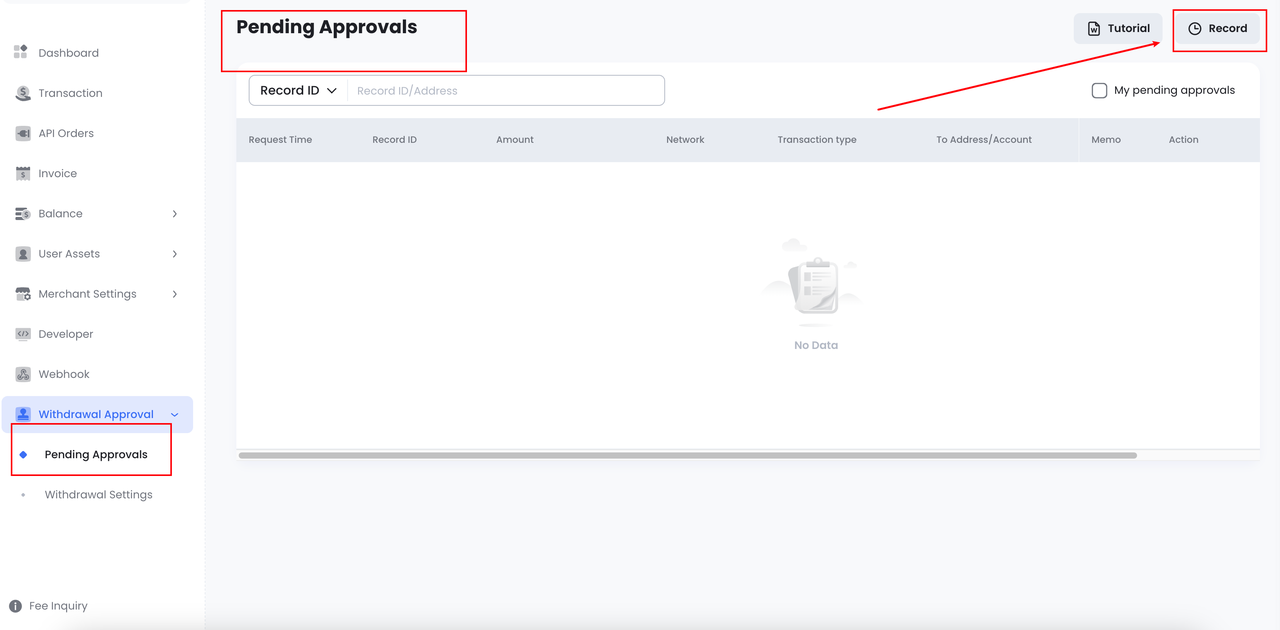
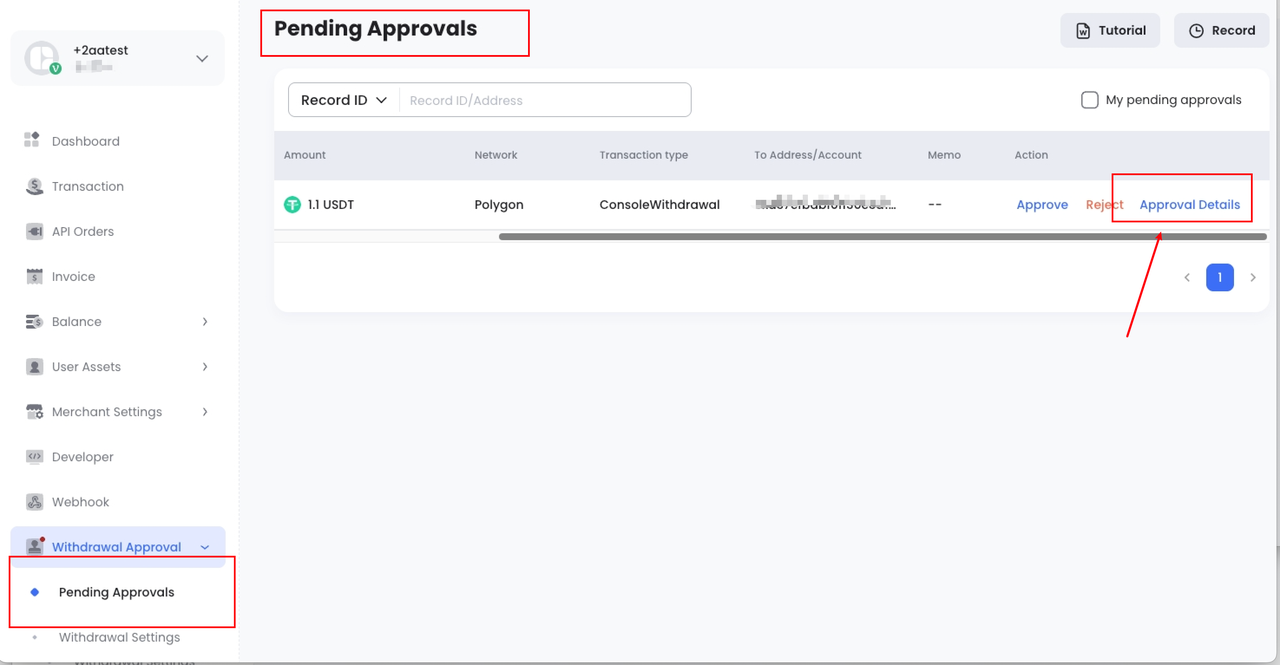
Any withdrawal over the amount you specify will appear in the "Pending approvals" section for approval. Here you can:
- To Approve: If the withdrawal request looks valid, click the Approve button. This will trigger the transfer of funds to the receiving address. You can check the "My Pending Approval" box to view requests awaiting your action.
- To Reject: If there are any concerns (e.g., suspicious activity or incorrect details), click on Reject to cancel the request. You can also provide a reason for rejection if needed.
Note: Under tier-approval withdrawal, you can only approve or reject a request after it has been approved by a Tier 1 approver. Otherwise, only the details will be displayed.
Step 5: Monitor Approved Withdrawals
After approving a withdrawal, you can track its status under the "Record" section. This will confirm if the transfer was processed successfully.