
Introductions
Introductions
USD Settlement
Auto Withdrawal
Withdrawal Approval
Resend Webhook
Risky Address Management
Invite Member
Withdrawal Approval
07 Sep. 2026 00:00
CCPayment's Withdrawal Approval feature allows you to review withdrawal requests that meet your configured approval rules before they are processed. You can set approval thresholds, assign approvers, manage withdrawal destinations, and configure separate approval rules for standard and bulk withdrawals, giving you greater control over your funds.
Follow this guide to configure and use Withdrawal Approval effectively.
Step 1: Access Withdrawal Approval Settings
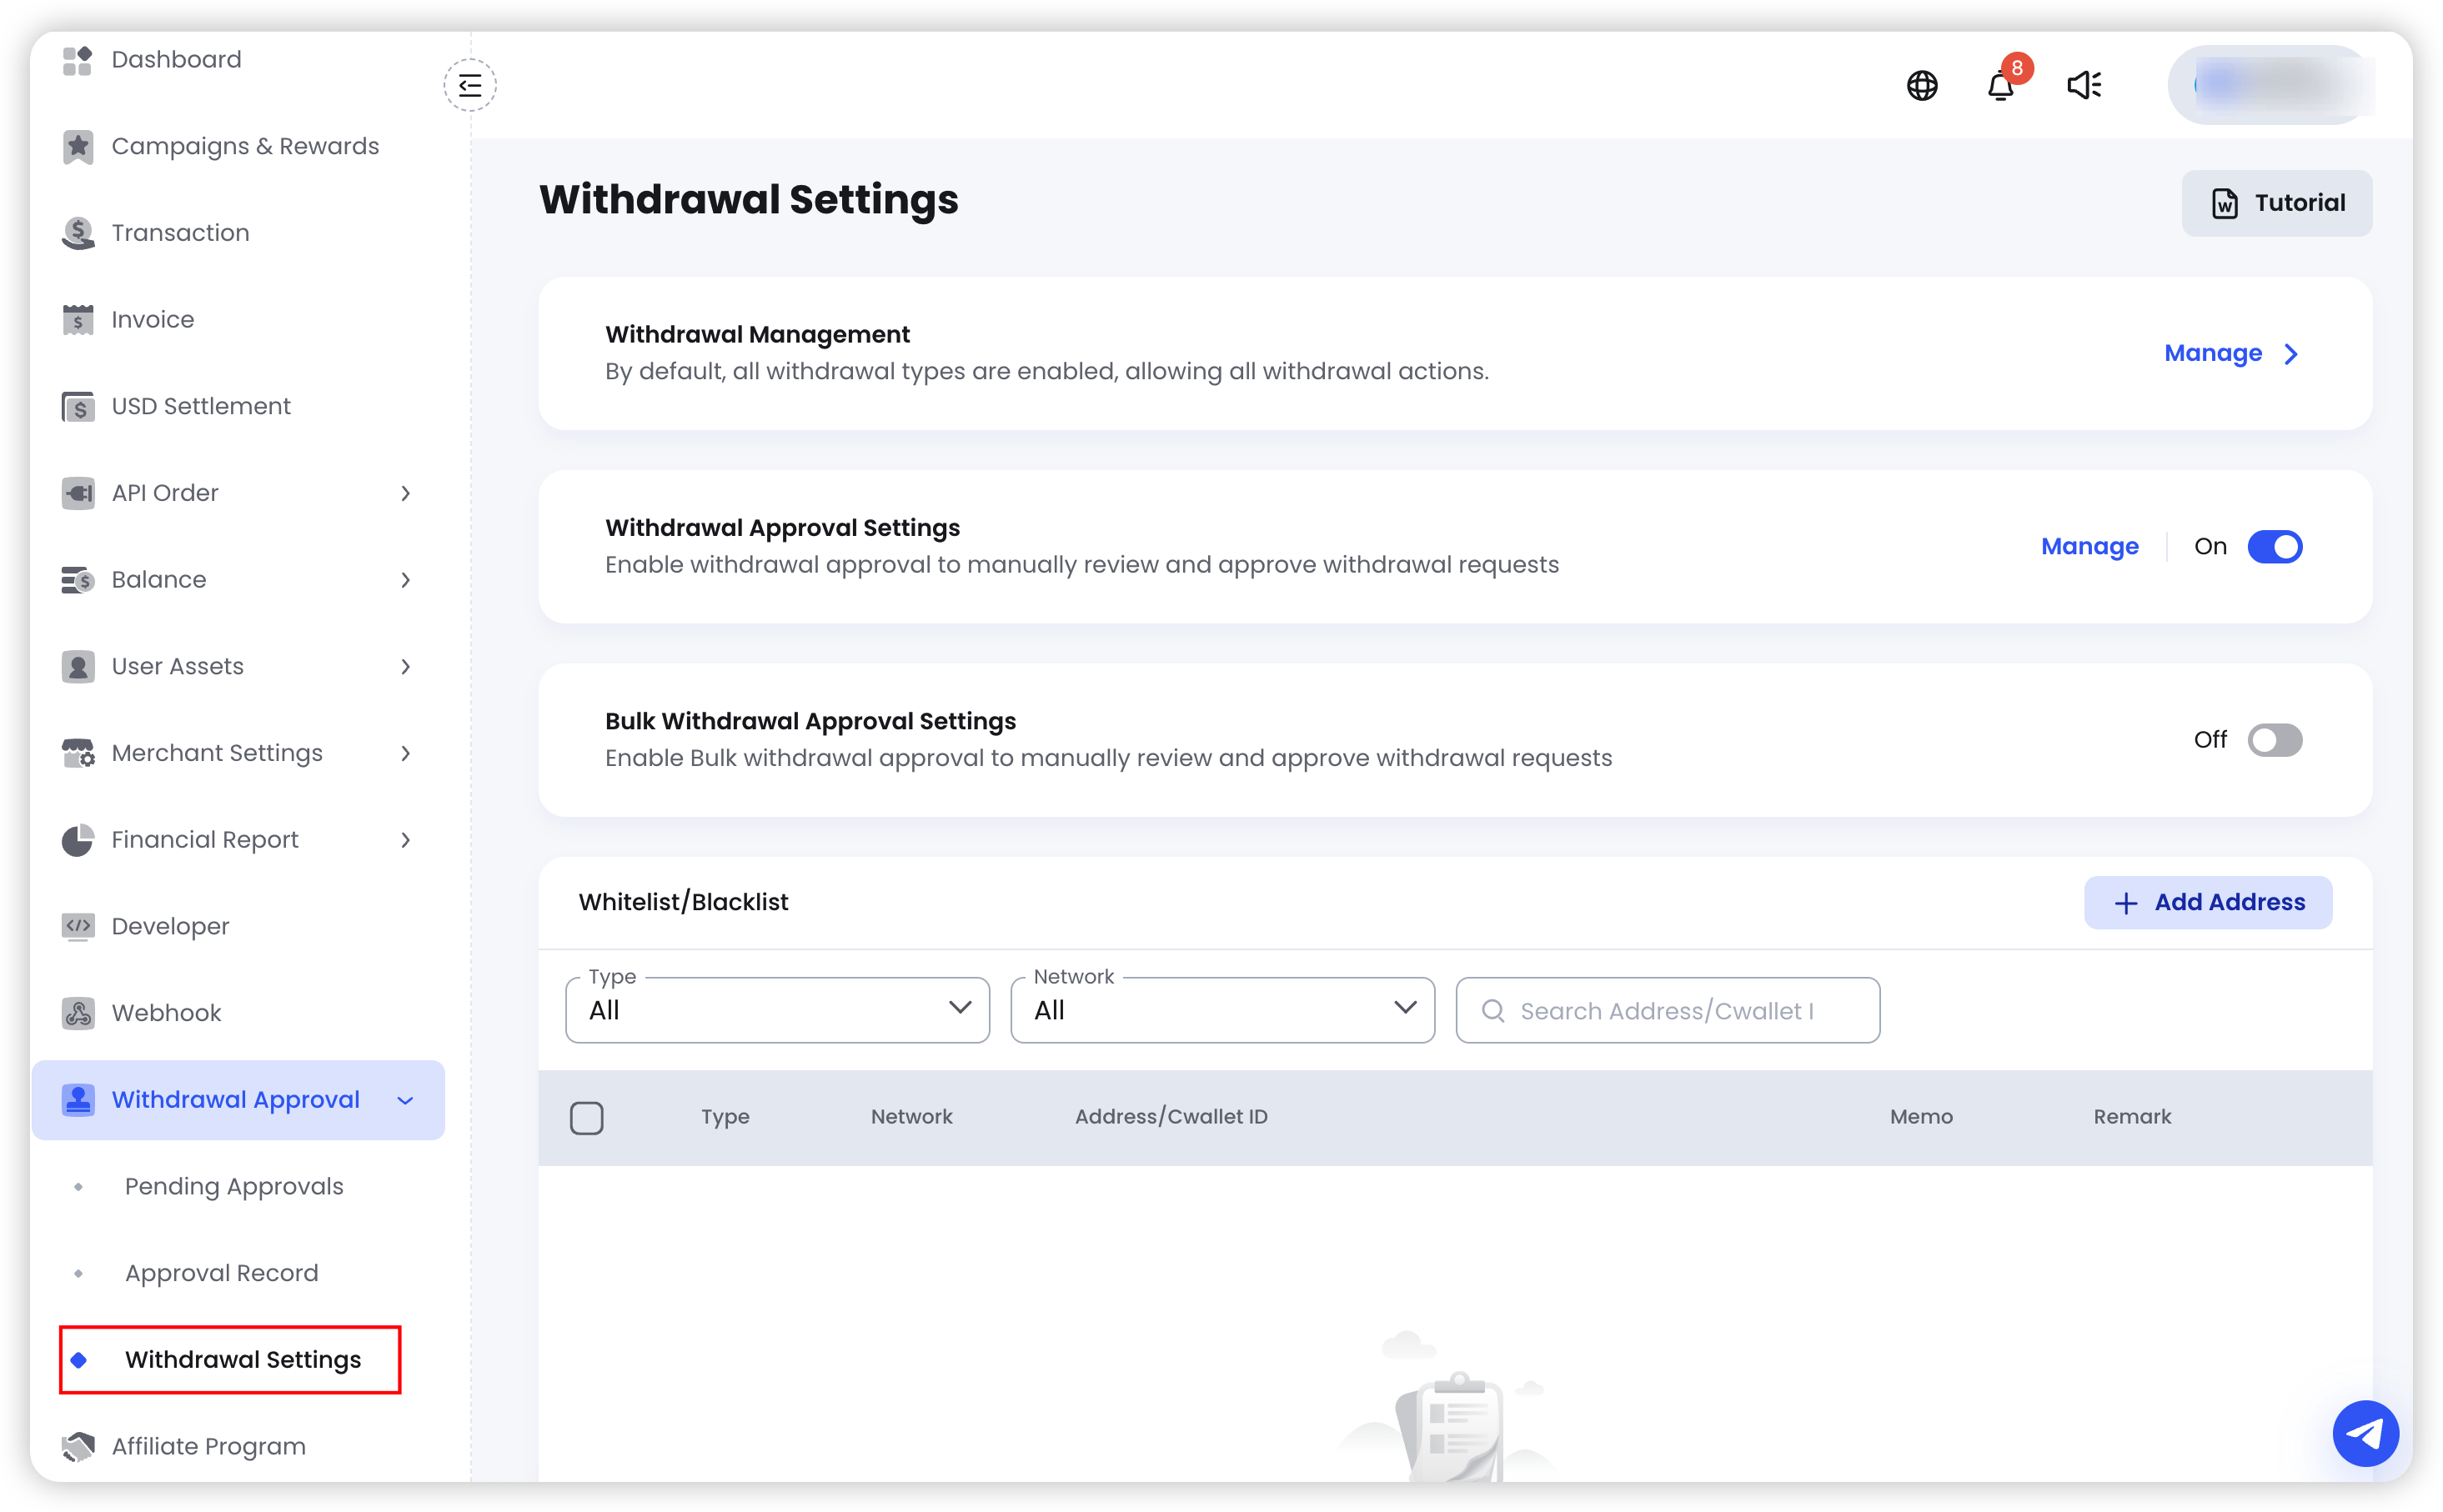
Log in to your CCPayment merchant account. Go to Withdrawal Approval → Withdrawal Settings to configure your withdrawal management, approval, and address rules.
Step 2: Manage Withdrawal Types
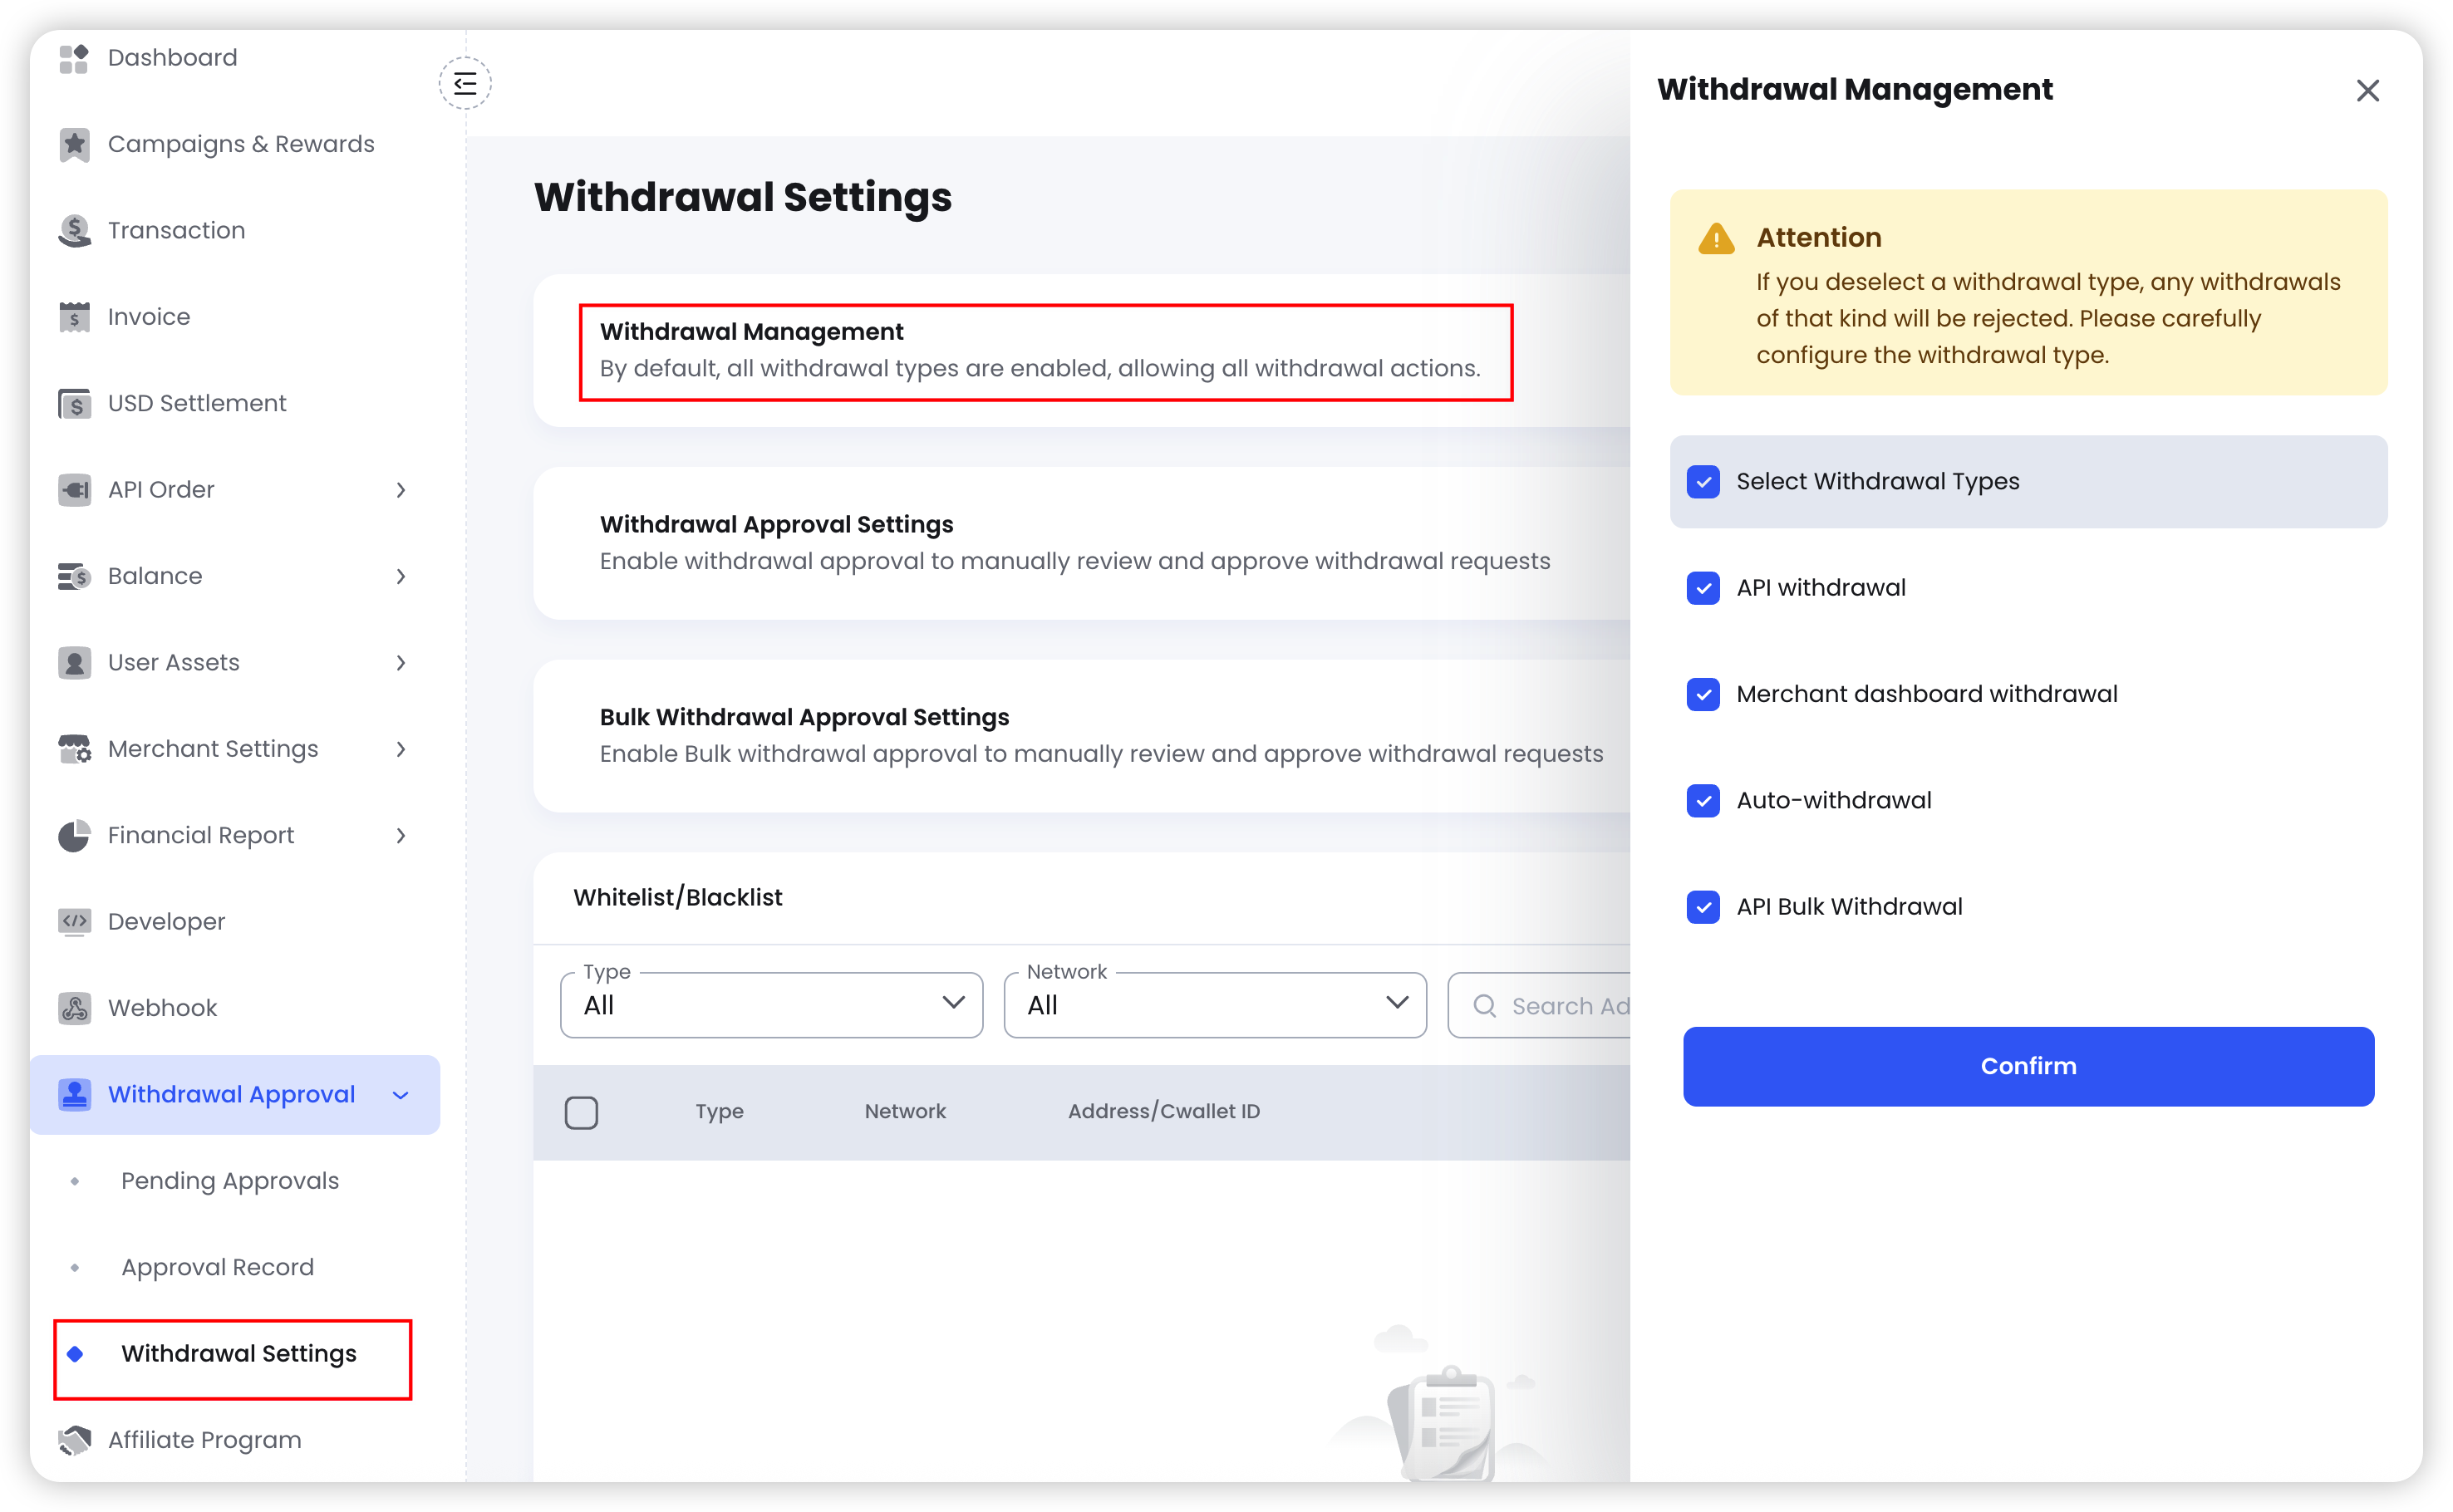
In the Withdrawal Management section, you can select the withdrawal types your account is allowed to process:
- API withdrawal
- Merchant dashboard withdrawal
- Auto-withdrawal
- API Bulk Withdrawal
By default, all withdrawal types are enabled. If you deselect a withdrawal type, all withdrawal requests of that type will be rejected.
Review your selections carefully, then click Confirm.
Note: Withdrawals of risky funds do not require approval.
Step 3: Configure the Whitelist and Blacklist
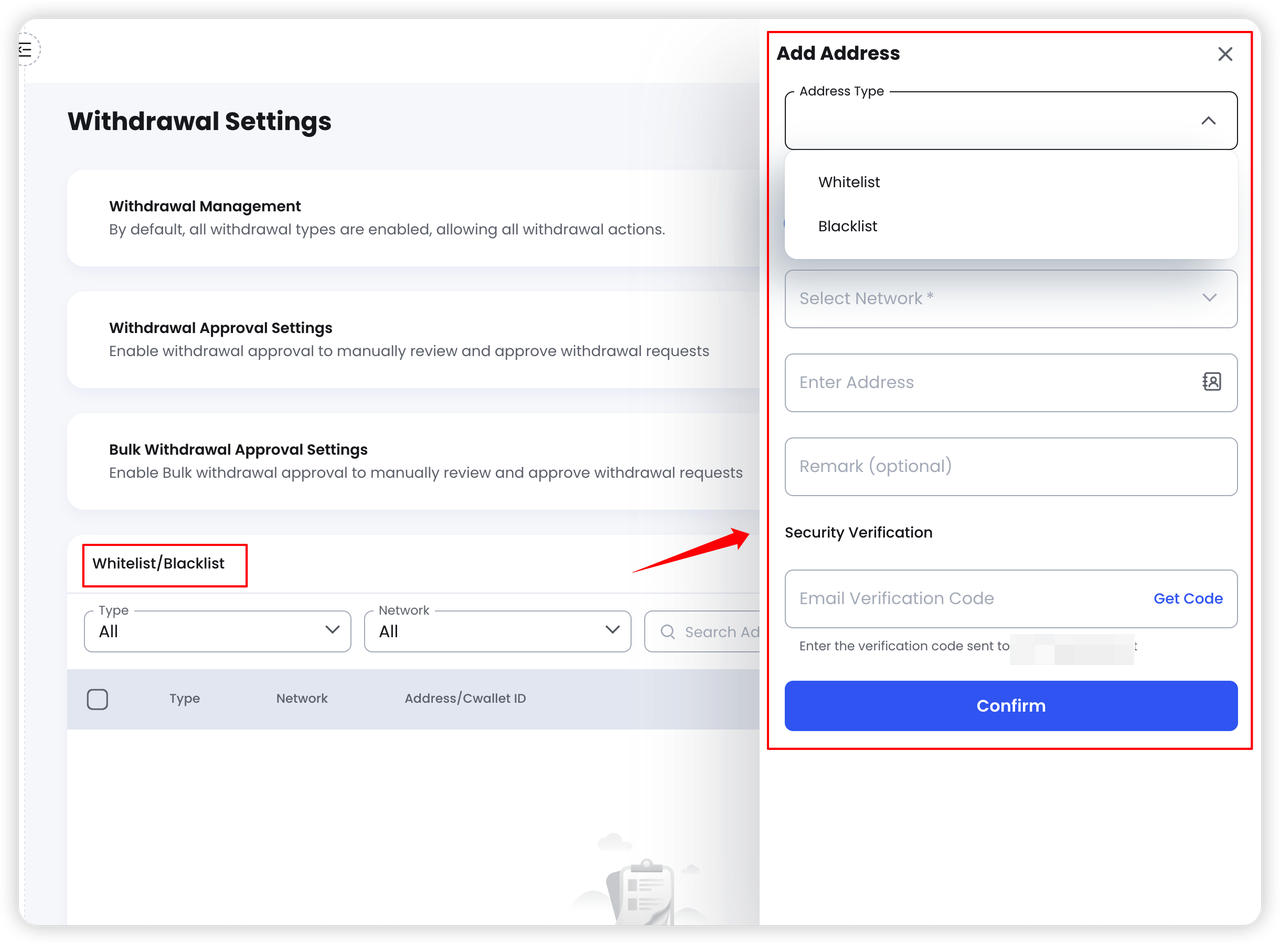
In the Whitelist/Blacklist section, click Add Address to add a withdrawal address or account to the whitelist or blacklist.
- Whitelist: Withdrawals to a whitelisted address or account do not require withdrawal approval.
- Blacklist: Withdrawal requests to a blacklisted address or account cannot be submitted.
Select the address type and network, then enter the wallet address. Complete the required security verification and click Confirm.
Please verify the network, address, and Memo/Tag (if required) before saving.
Step 4: Configure Withdrawal Approval
1. Configure Single Withdrawal Approval Settings
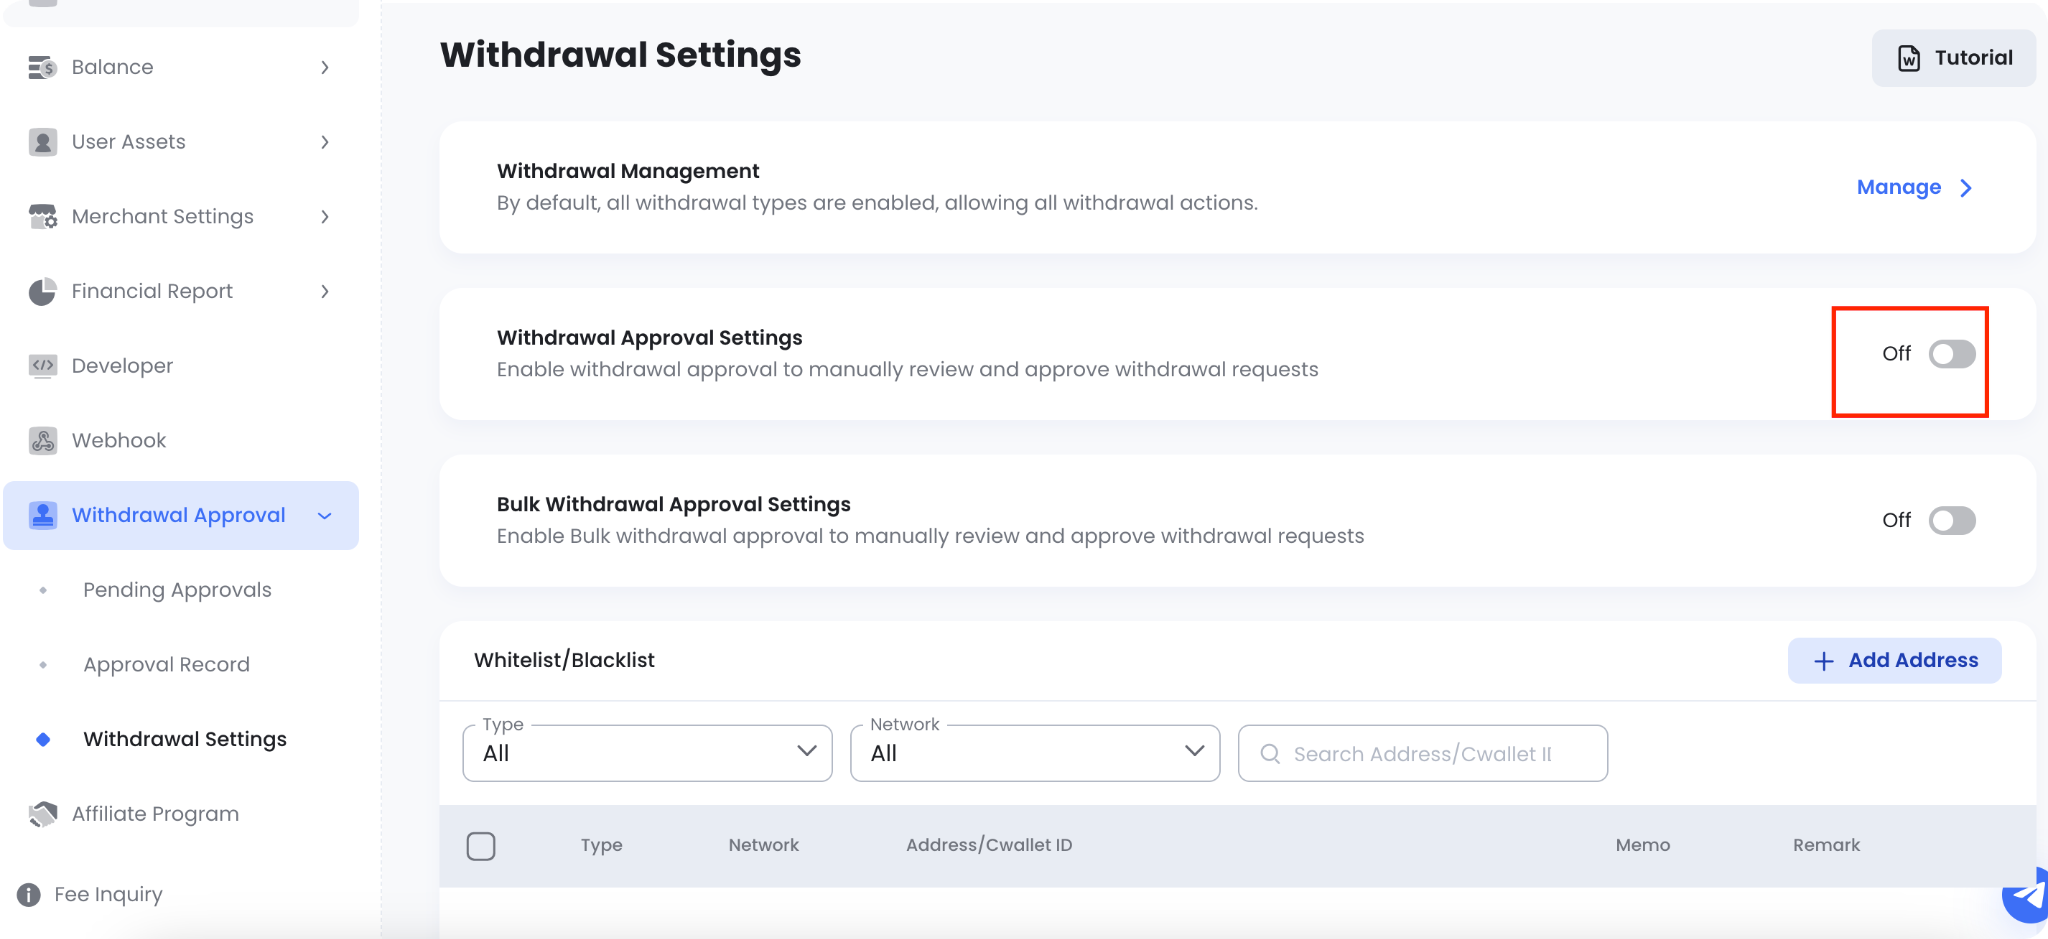
Turn on Withdrawal Approval Settings to enable approval for single withdrawal requests.
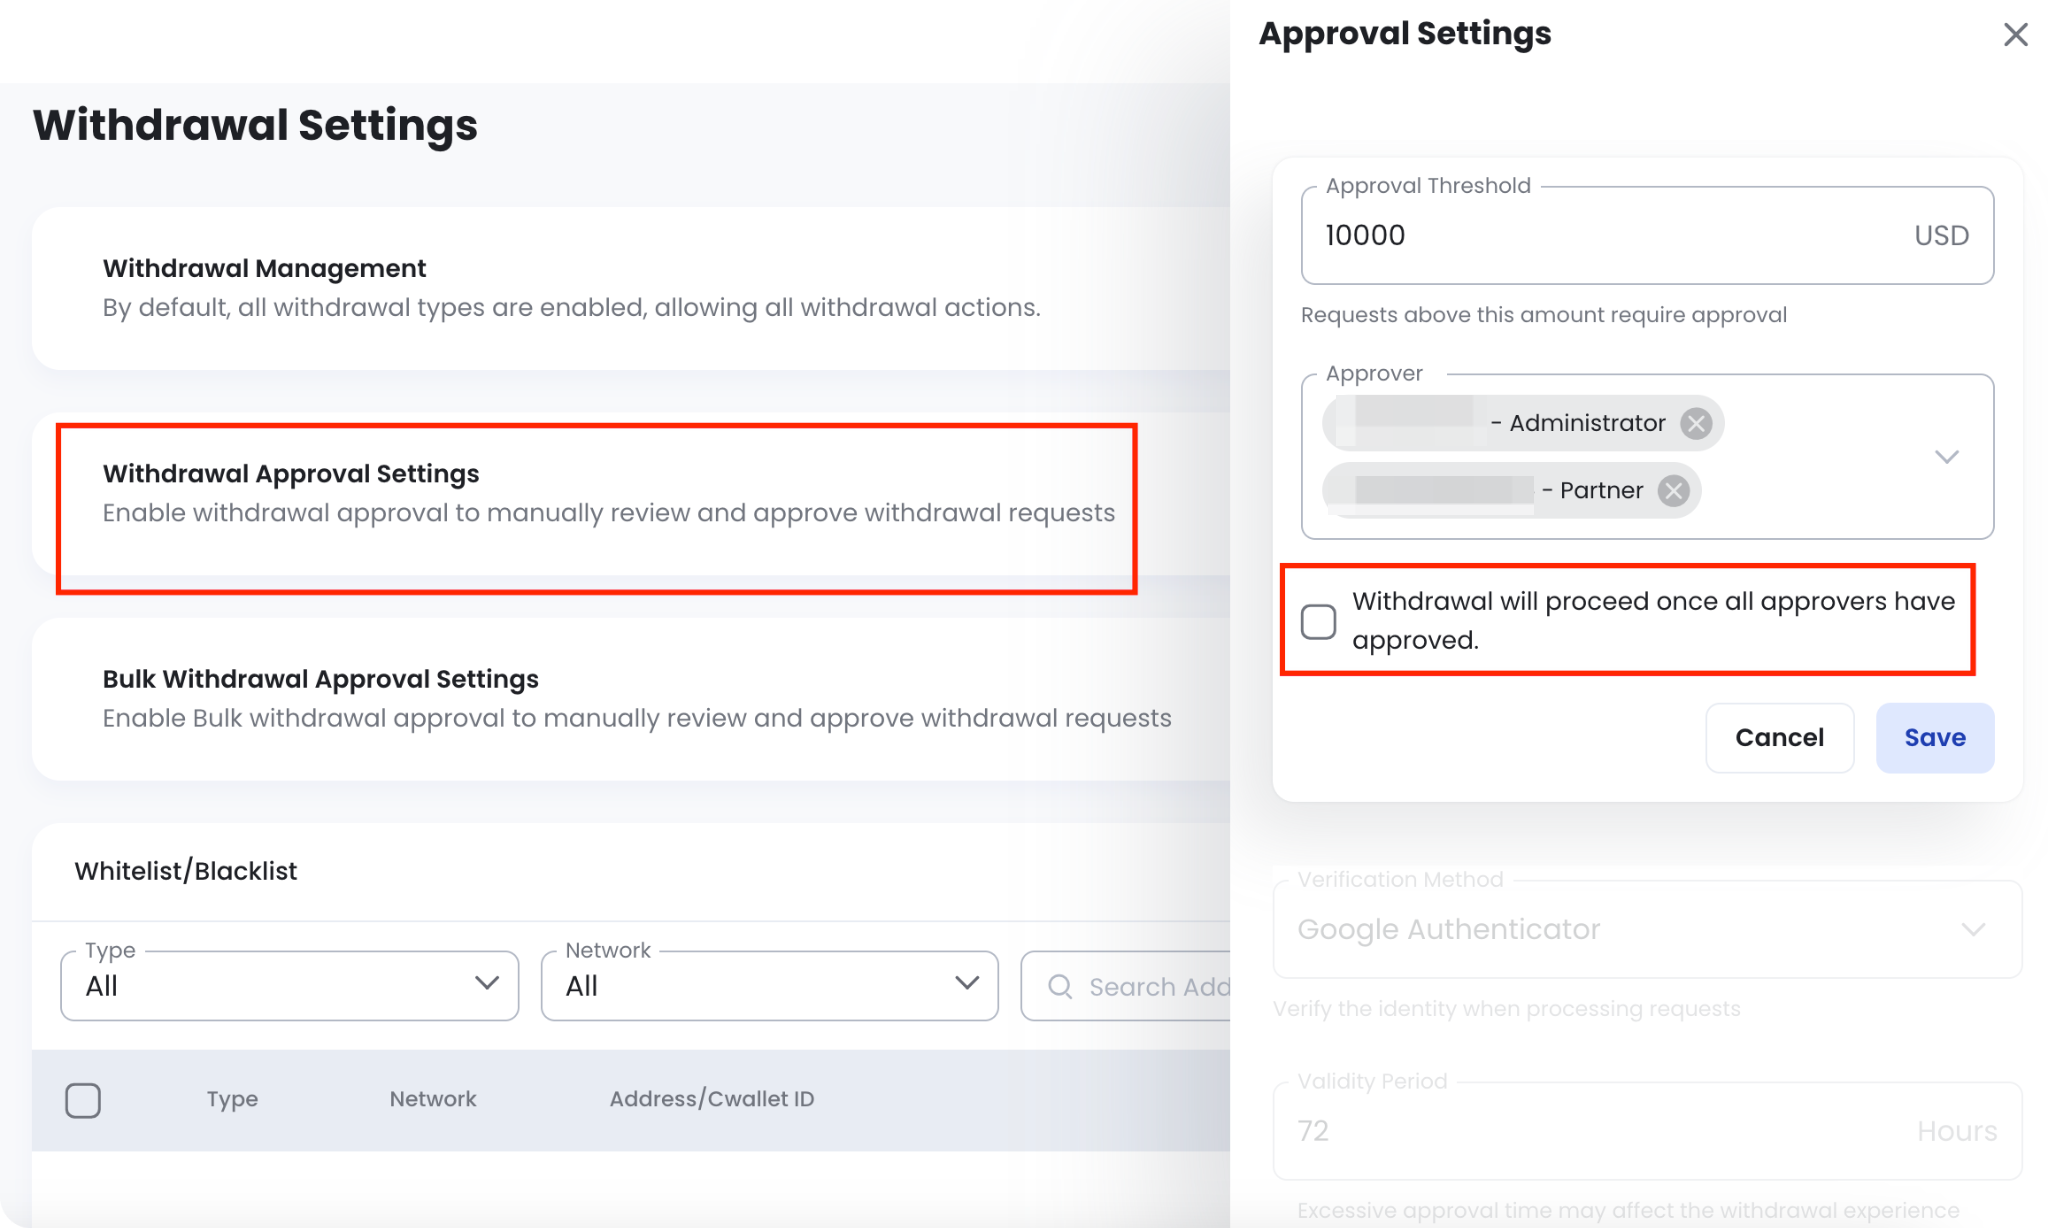
In the Approval Settings panel, configure the following:
- Withdrawal Types: Select API withdrawal, Withdrawal, or both.
- Approval Threshold: Enter the USD-denominated threshold. Withdrawal requests above this amount will require approval.
- Approver: Select one or more account members responsible for reviewing the requests.
- Approval Requirement: If multiple approvers are selected, decide whether approval from all assigned approvers is required.
- Select Withdrawal will proceed once all approvers have approved to require approval from every assigned approver.
- Leave it unselected if approval from any one of the assigned approvers is sufficient.
The approval requirement can be configured separately for each rule.
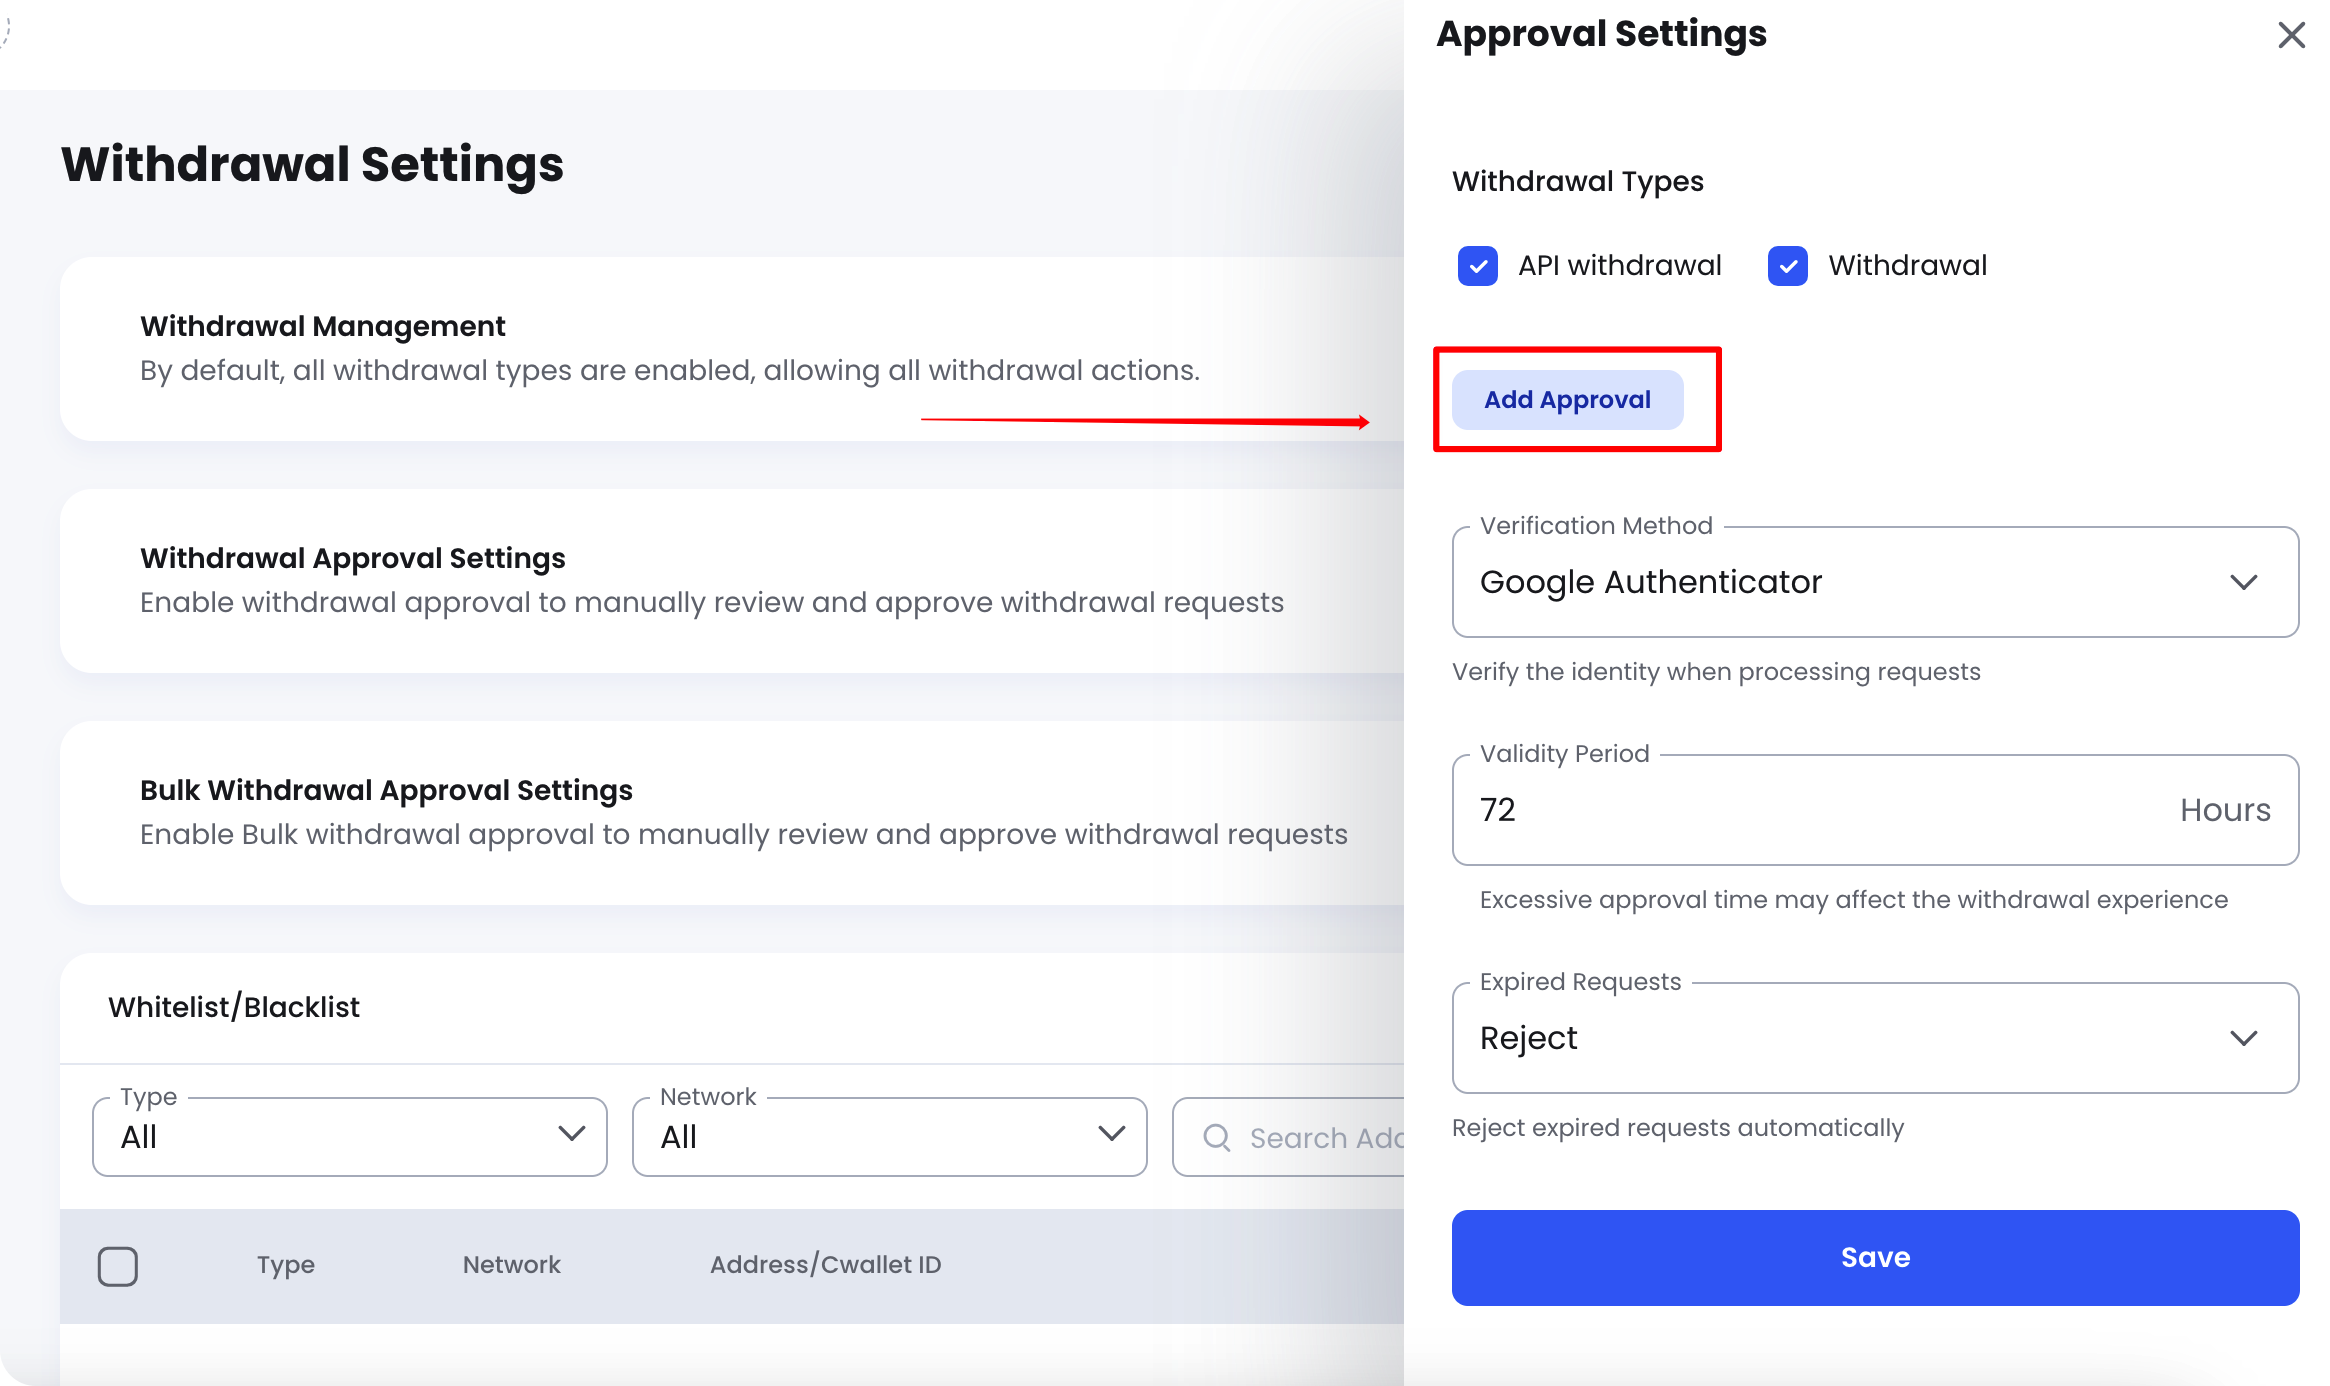
Add More Approval Rules
To add another approval rule, click Add Approval. In the Add Approval panel, set the approval threshold, select the approvers, and configure the approval requirement.
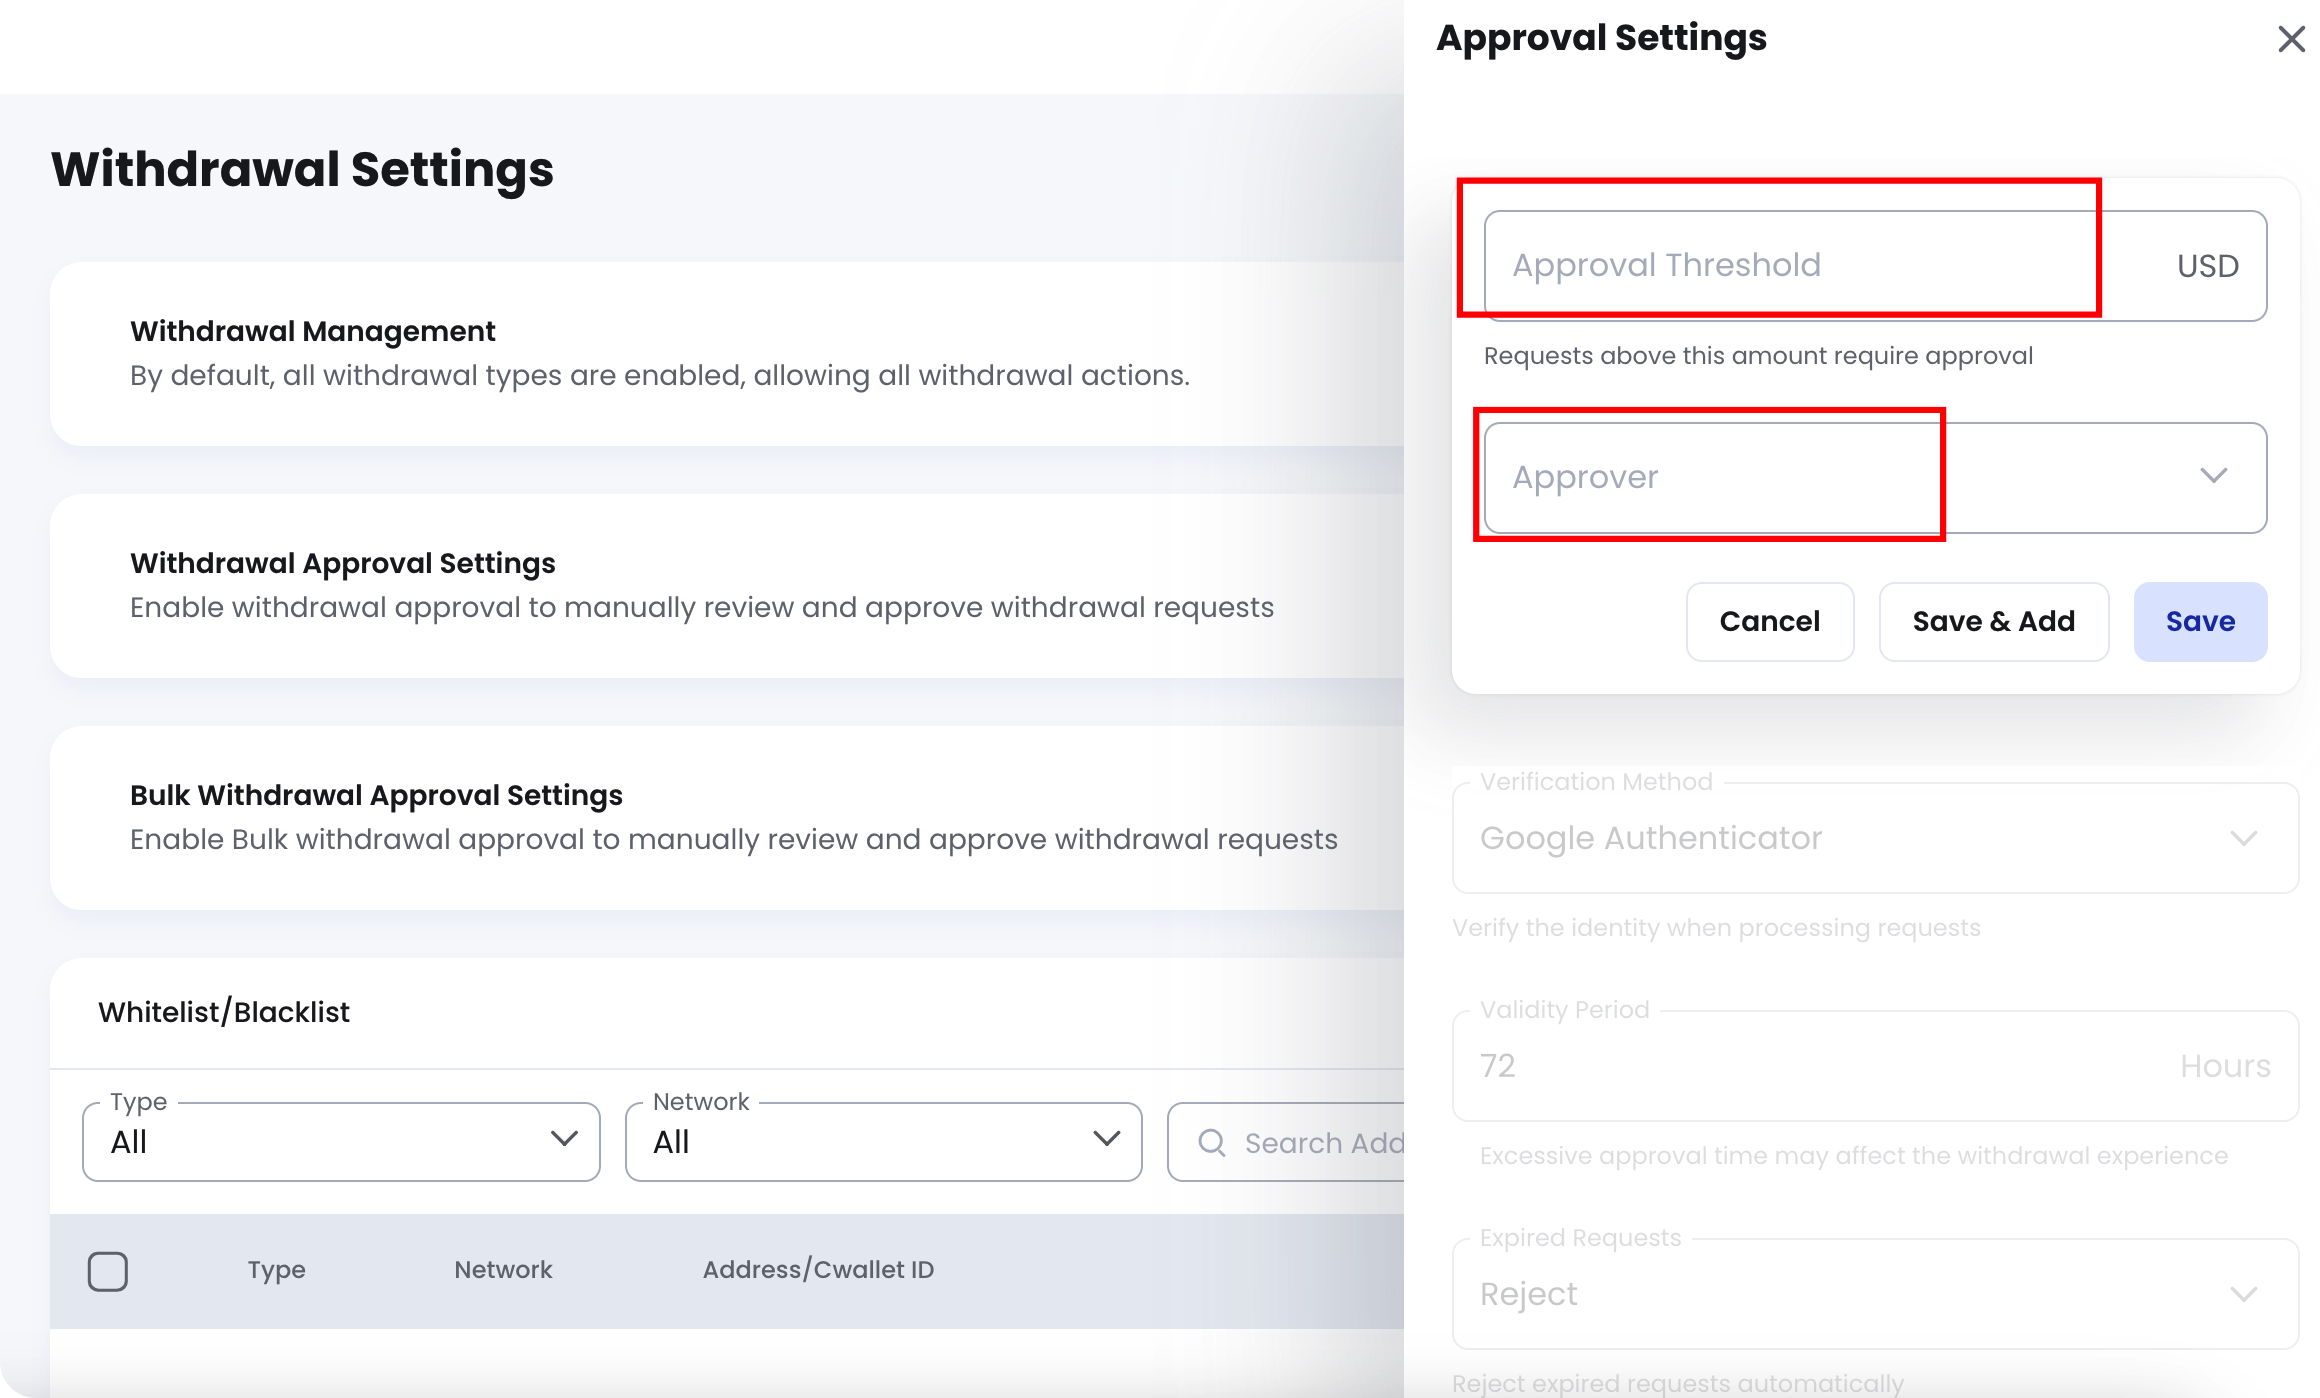
In the Add Approval panel, set the Approval Threshold and select one or more Approvers. Then:
- Click Save to save the current rule.
- Click Save & Add to save the current rule and continue adding another one.
You can configure up to three approval rules.
When multiple approval rules are added, select one of the following Approval Types:
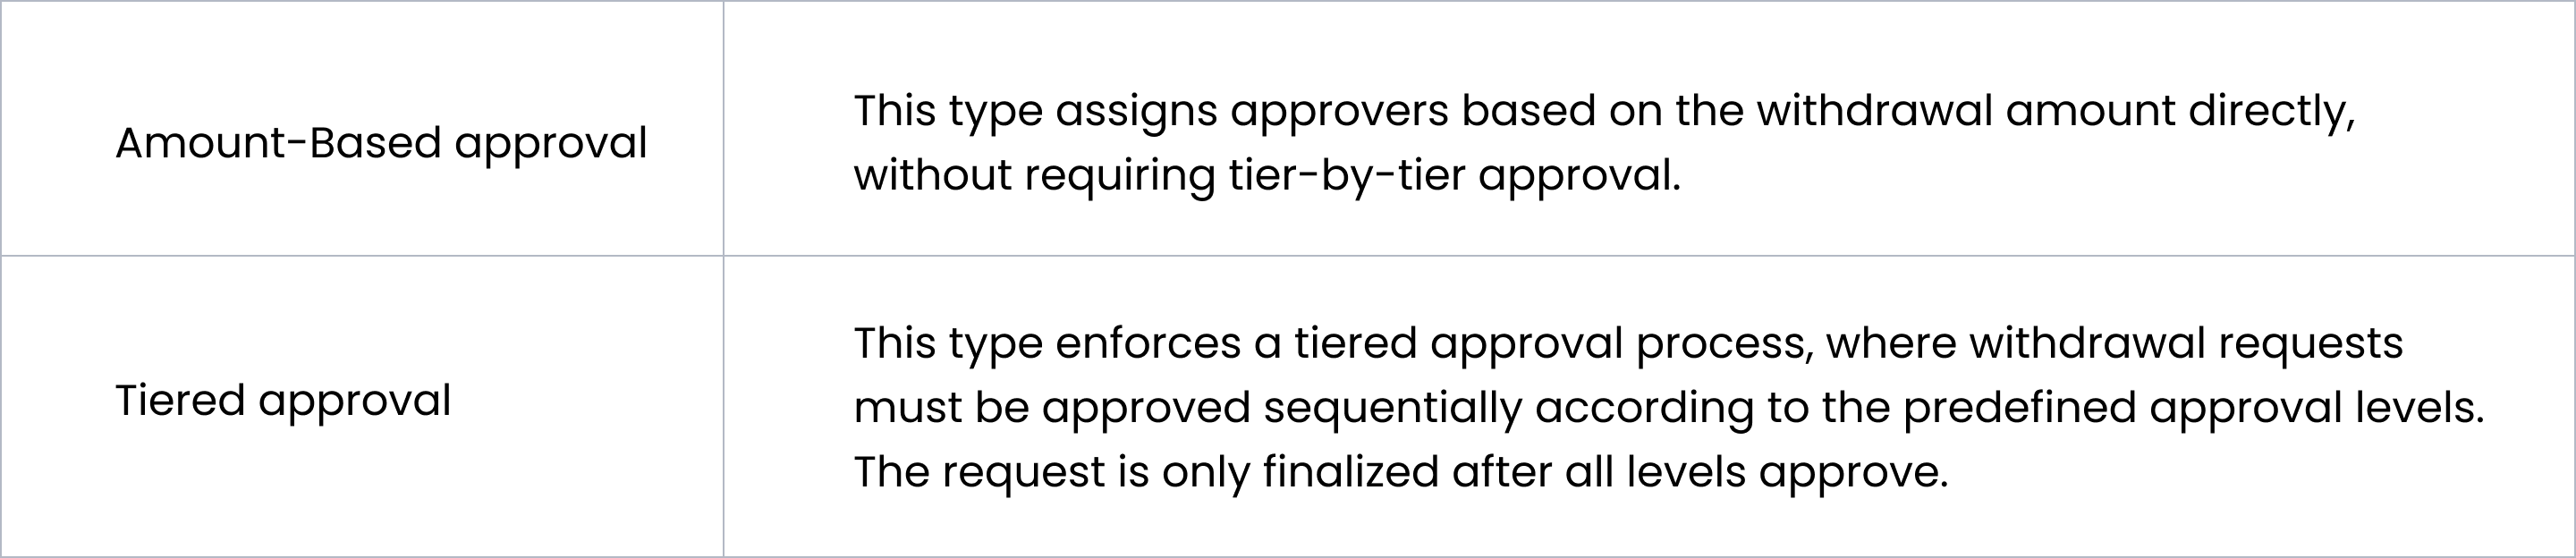
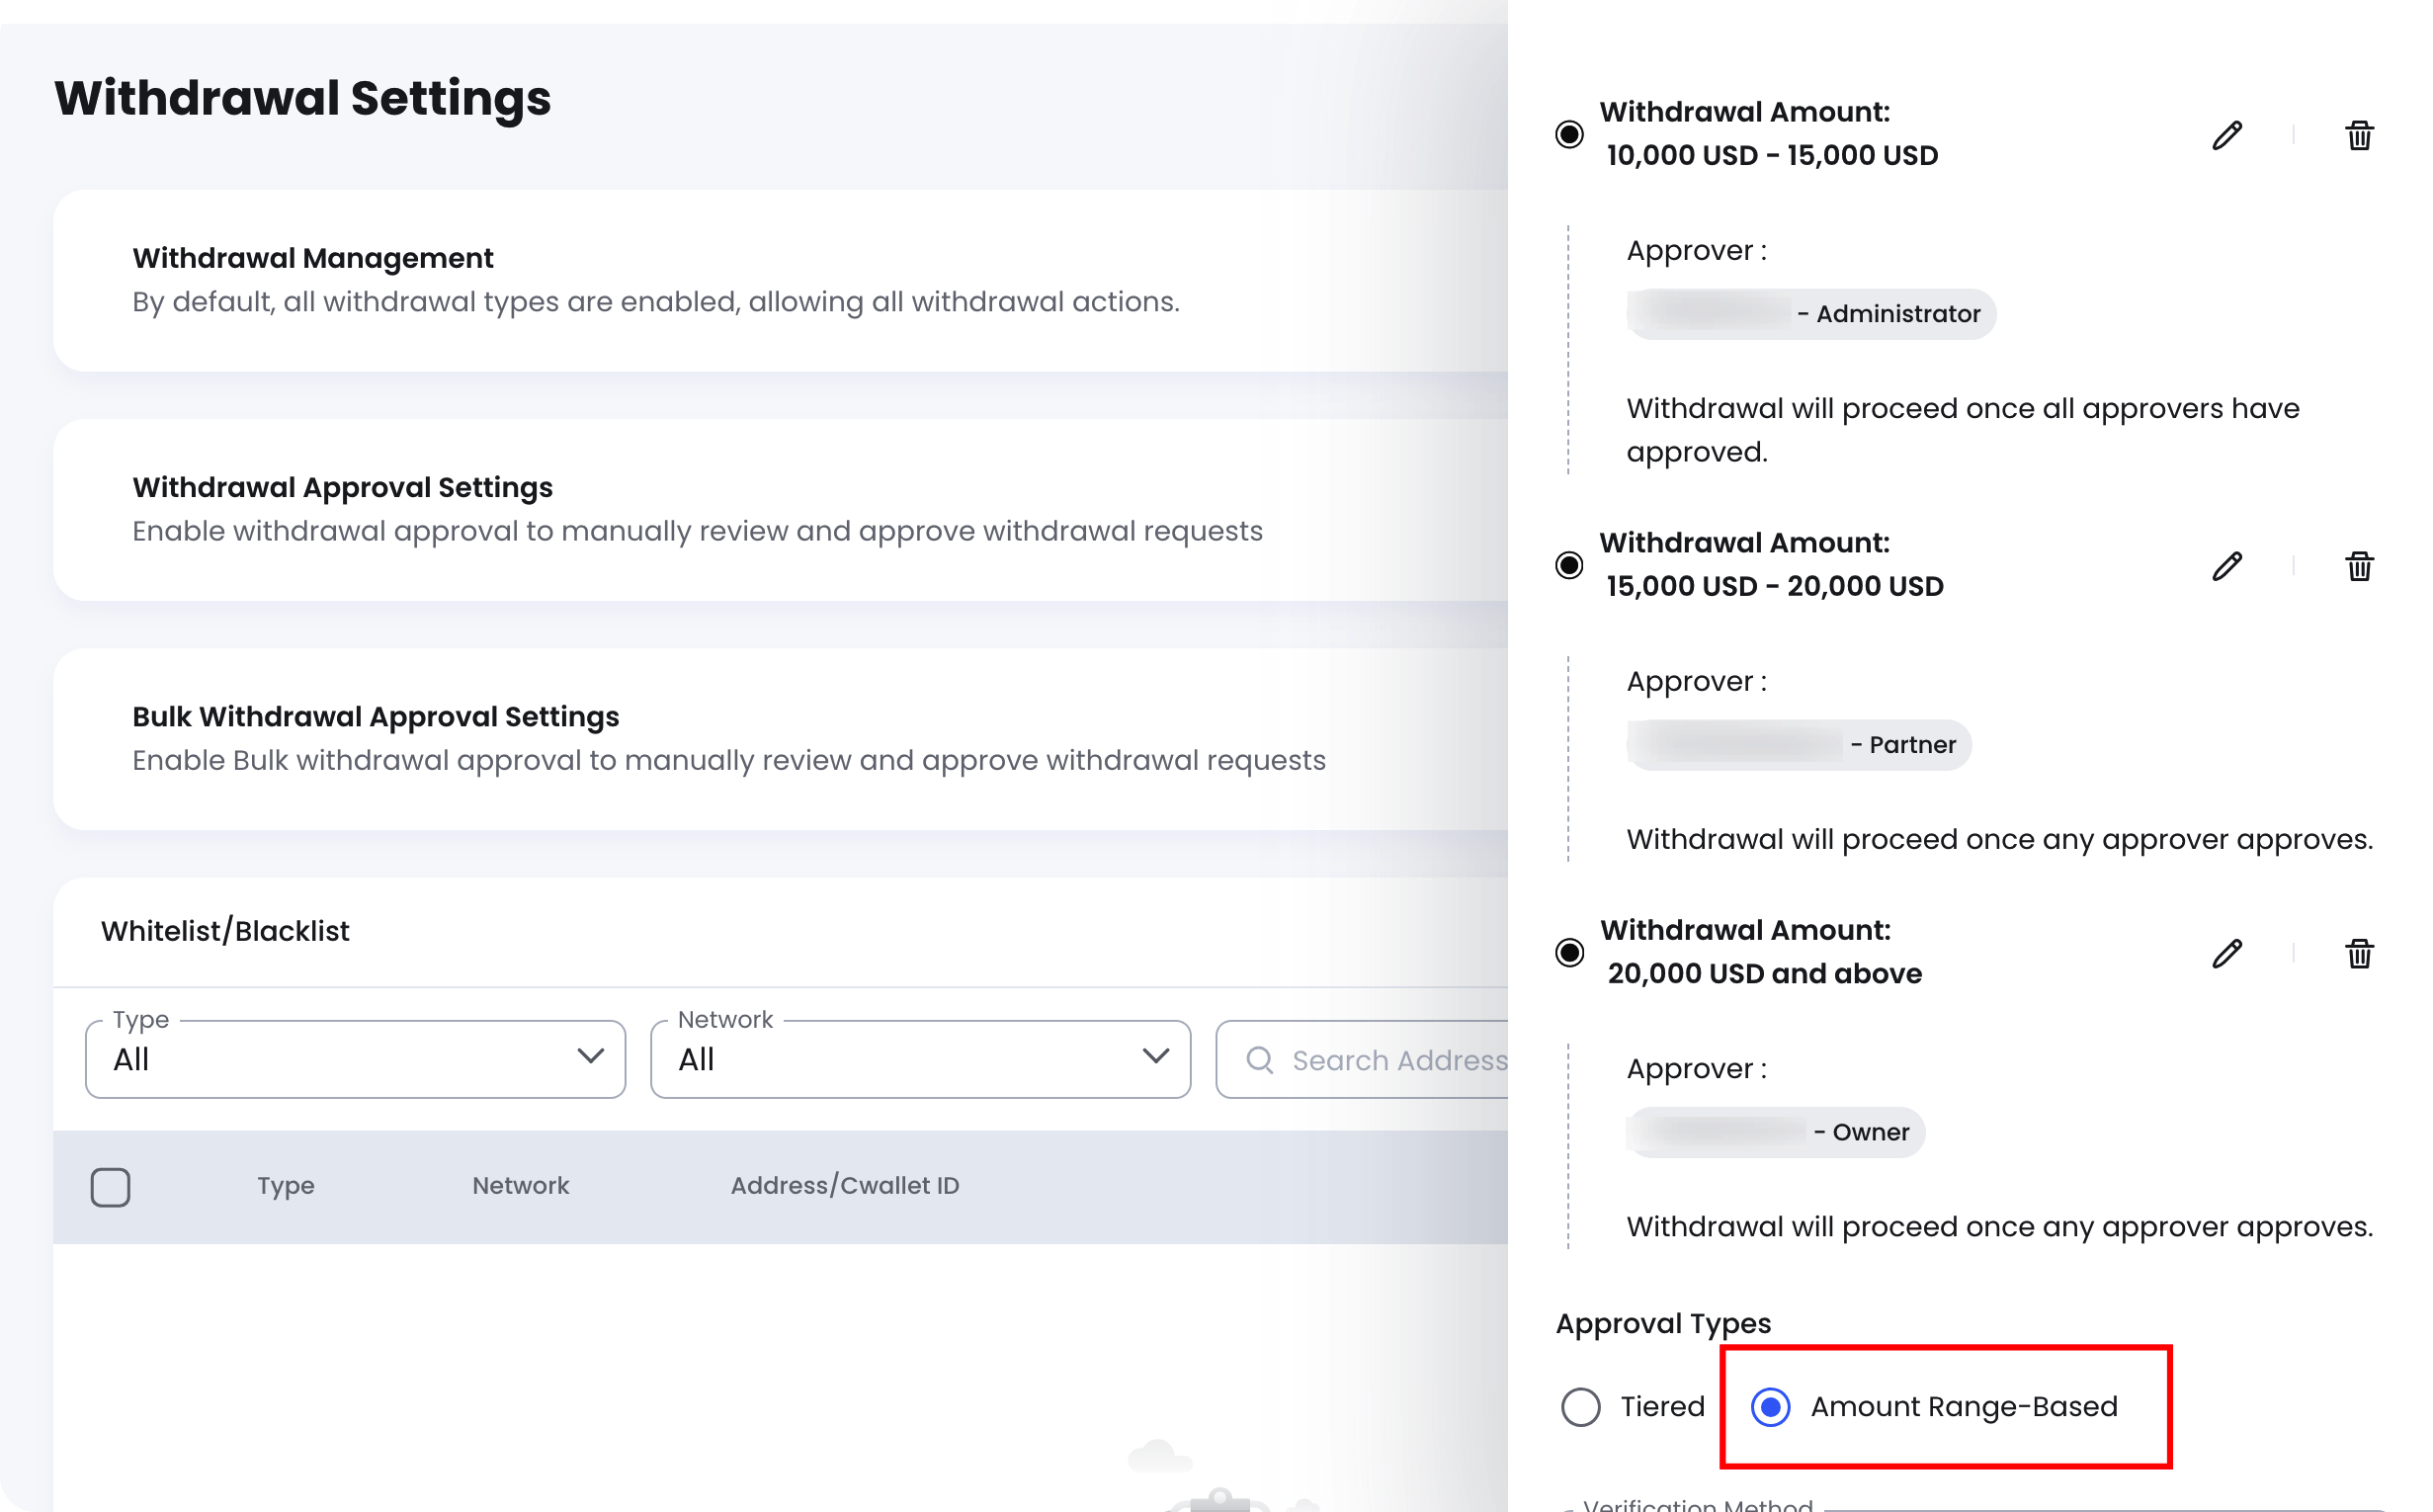
Amount Range-Based
Select Amount Range-Based to assign different approvers according to the withdrawal amount range. Only the approvers assigned to the applicable range need to review the request.
For example, if thresholds of $10,000, $15,000, and $20,000 are assigned to Approvers A, B, and C:
- A $12,000 withdrawal will be reviewed by Approver A.
- An $18,000 withdrawal will be reviewed by Approver B.
- A $25,000 withdrawal will be reviewed by Approver C.
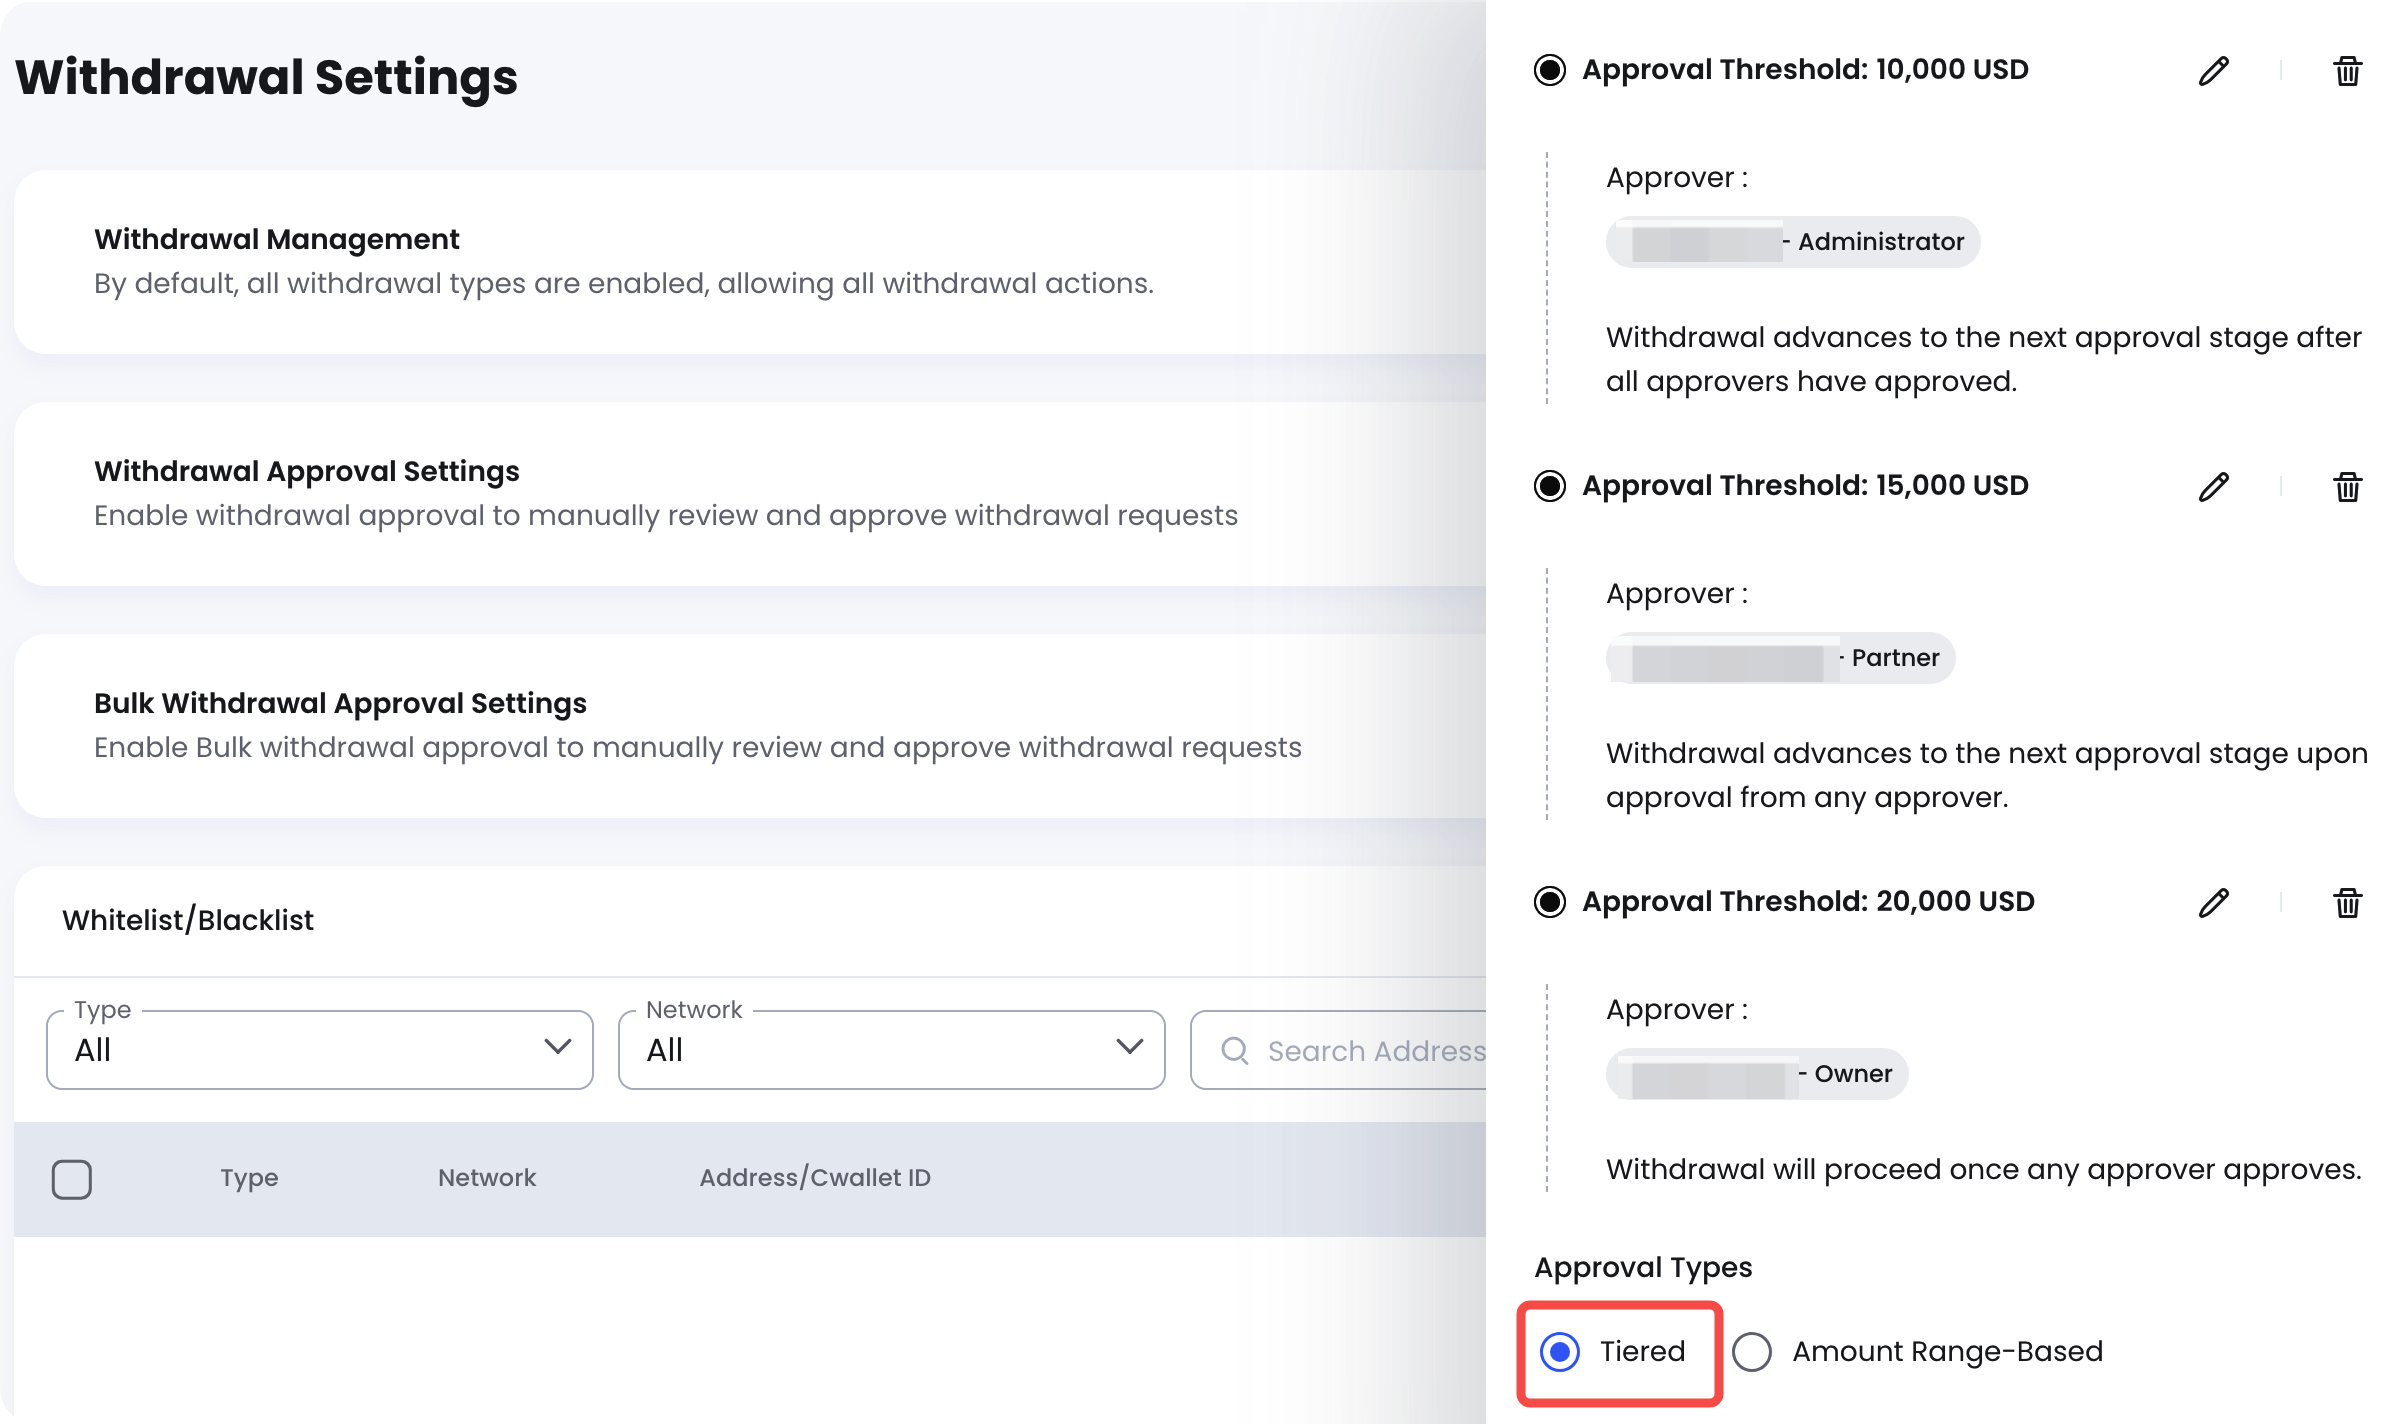
Tiered
Select Tiered to create a sequential approval process. A withdrawal request must complete each applicable approval stage in order before it can proceed.
You can configure up to three approval tiers.
For example, if the tiers are configured as follows:
- Tier 1 – $10,000: Approver A
- Tier 2 – $20,000: Approver B
- Tier 3 – $30,000: Approver C
Then:
- A $12,000 withdrawal requires approval from Approver A.
- A $25,000 withdrawal requires approval from Approvers A and B, in sequence.
- A $35,000 withdrawal requires approval from all three tiers, in sequence.
For each tier, you can separately decide whether approval from any assigned approver or all assigned approvers is required.
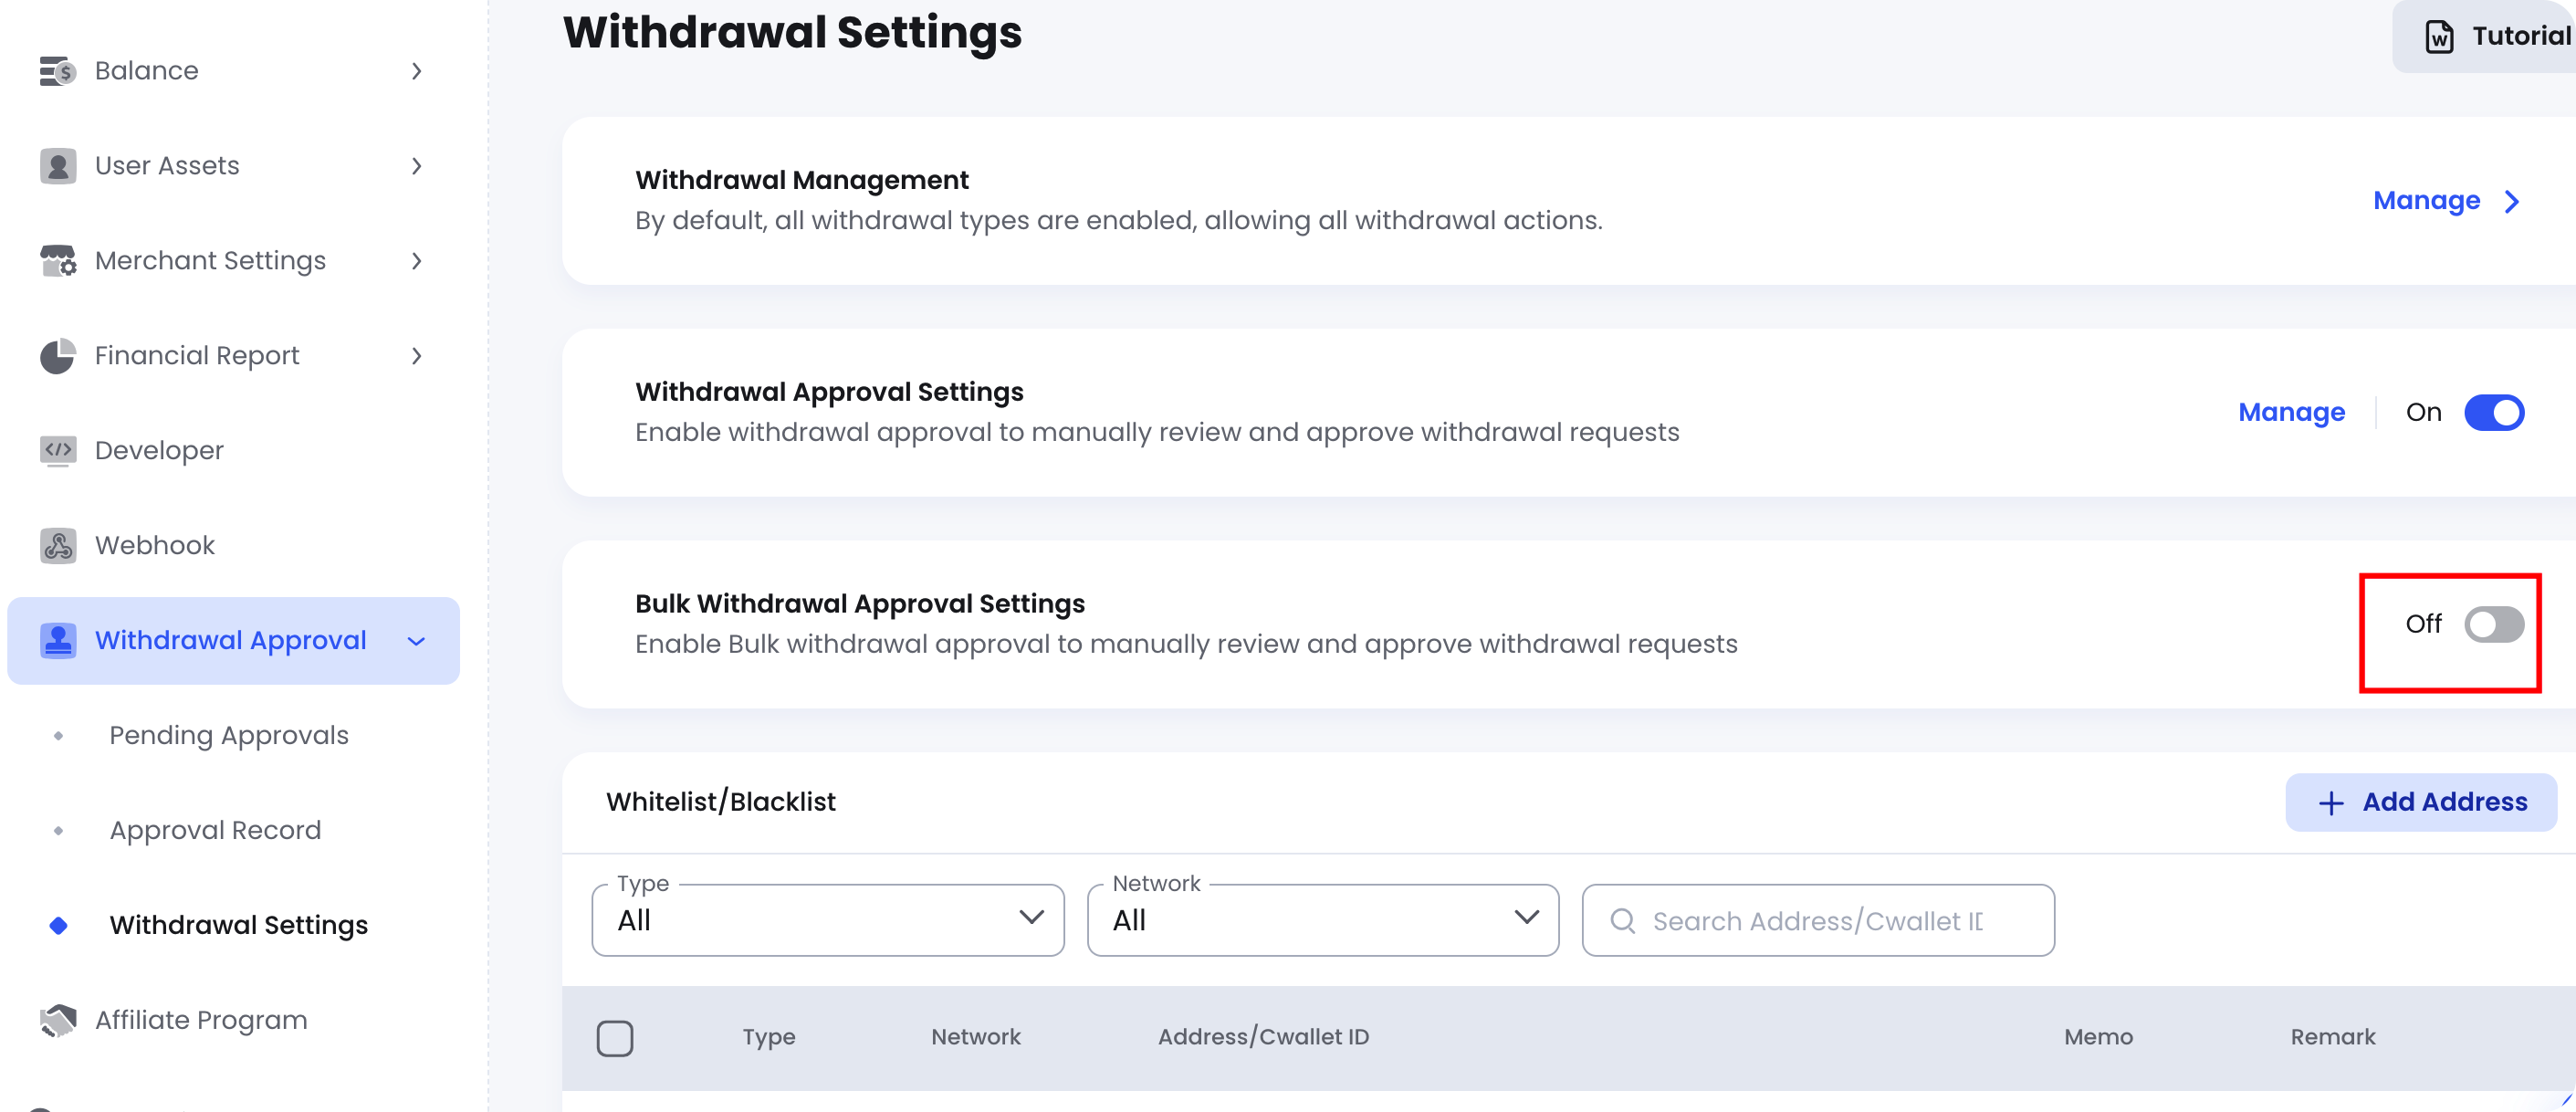
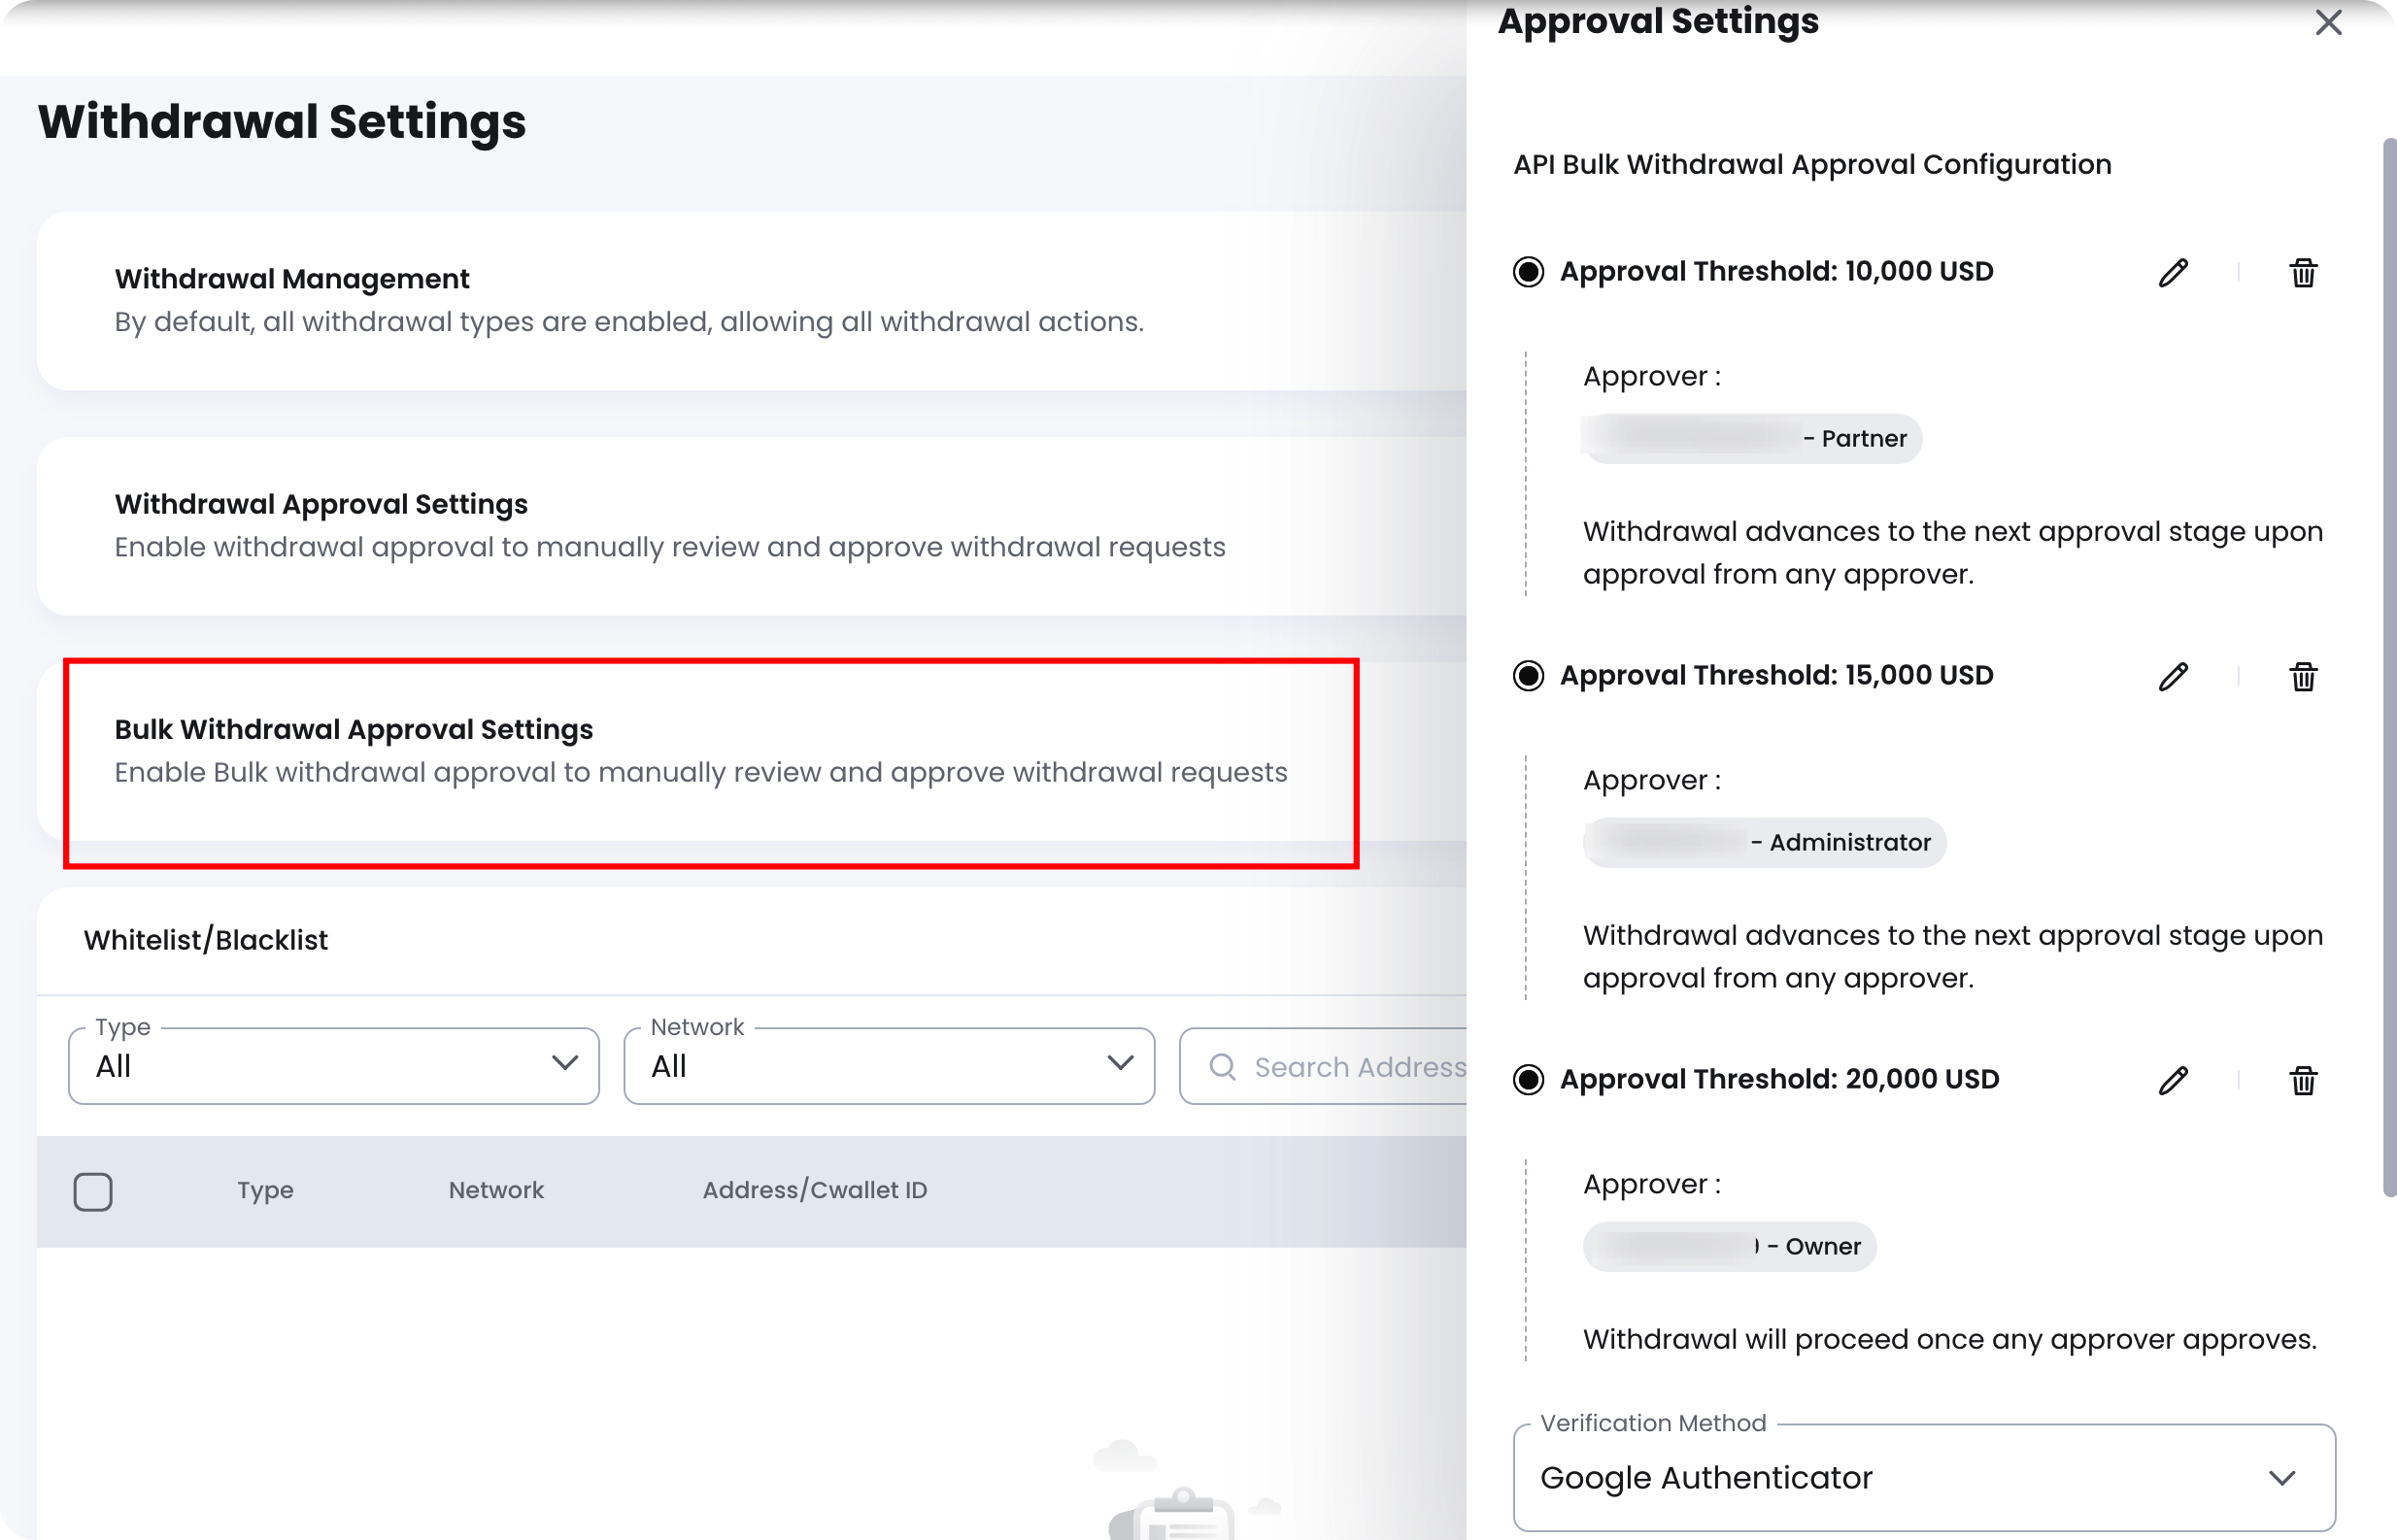
2. Configure Bulk Withdrawal Approval Settings
Turn on Bulk Withdrawal Approval Settings to enable approval for API bulk withdrawal requests.
In the API Bulk Withdrawal Approval Configuration panel, set the approval threshold, assign one or more approvers, and configure whether approval from any assigned approver or all assigned approvers is required.
Click Add Approval to add another approval threshold and create an additional approval stage. You can configure up to three approval stages.
Approval process
- Bulk withdrawal approval uses a Tiered approval process.
- If a request reaches multiple configured thresholds, it must complete each applicable approval stage in order.
- After the current stage is approved, the request advances to the next stage.
- Once all required stages are approved, the request can proceed.
Review the configuration, then click Save.
Step 5: Configure the Verification Method and Request Validity
Complete the following settings for both single withdrawal and API bulk withdrawal approval:
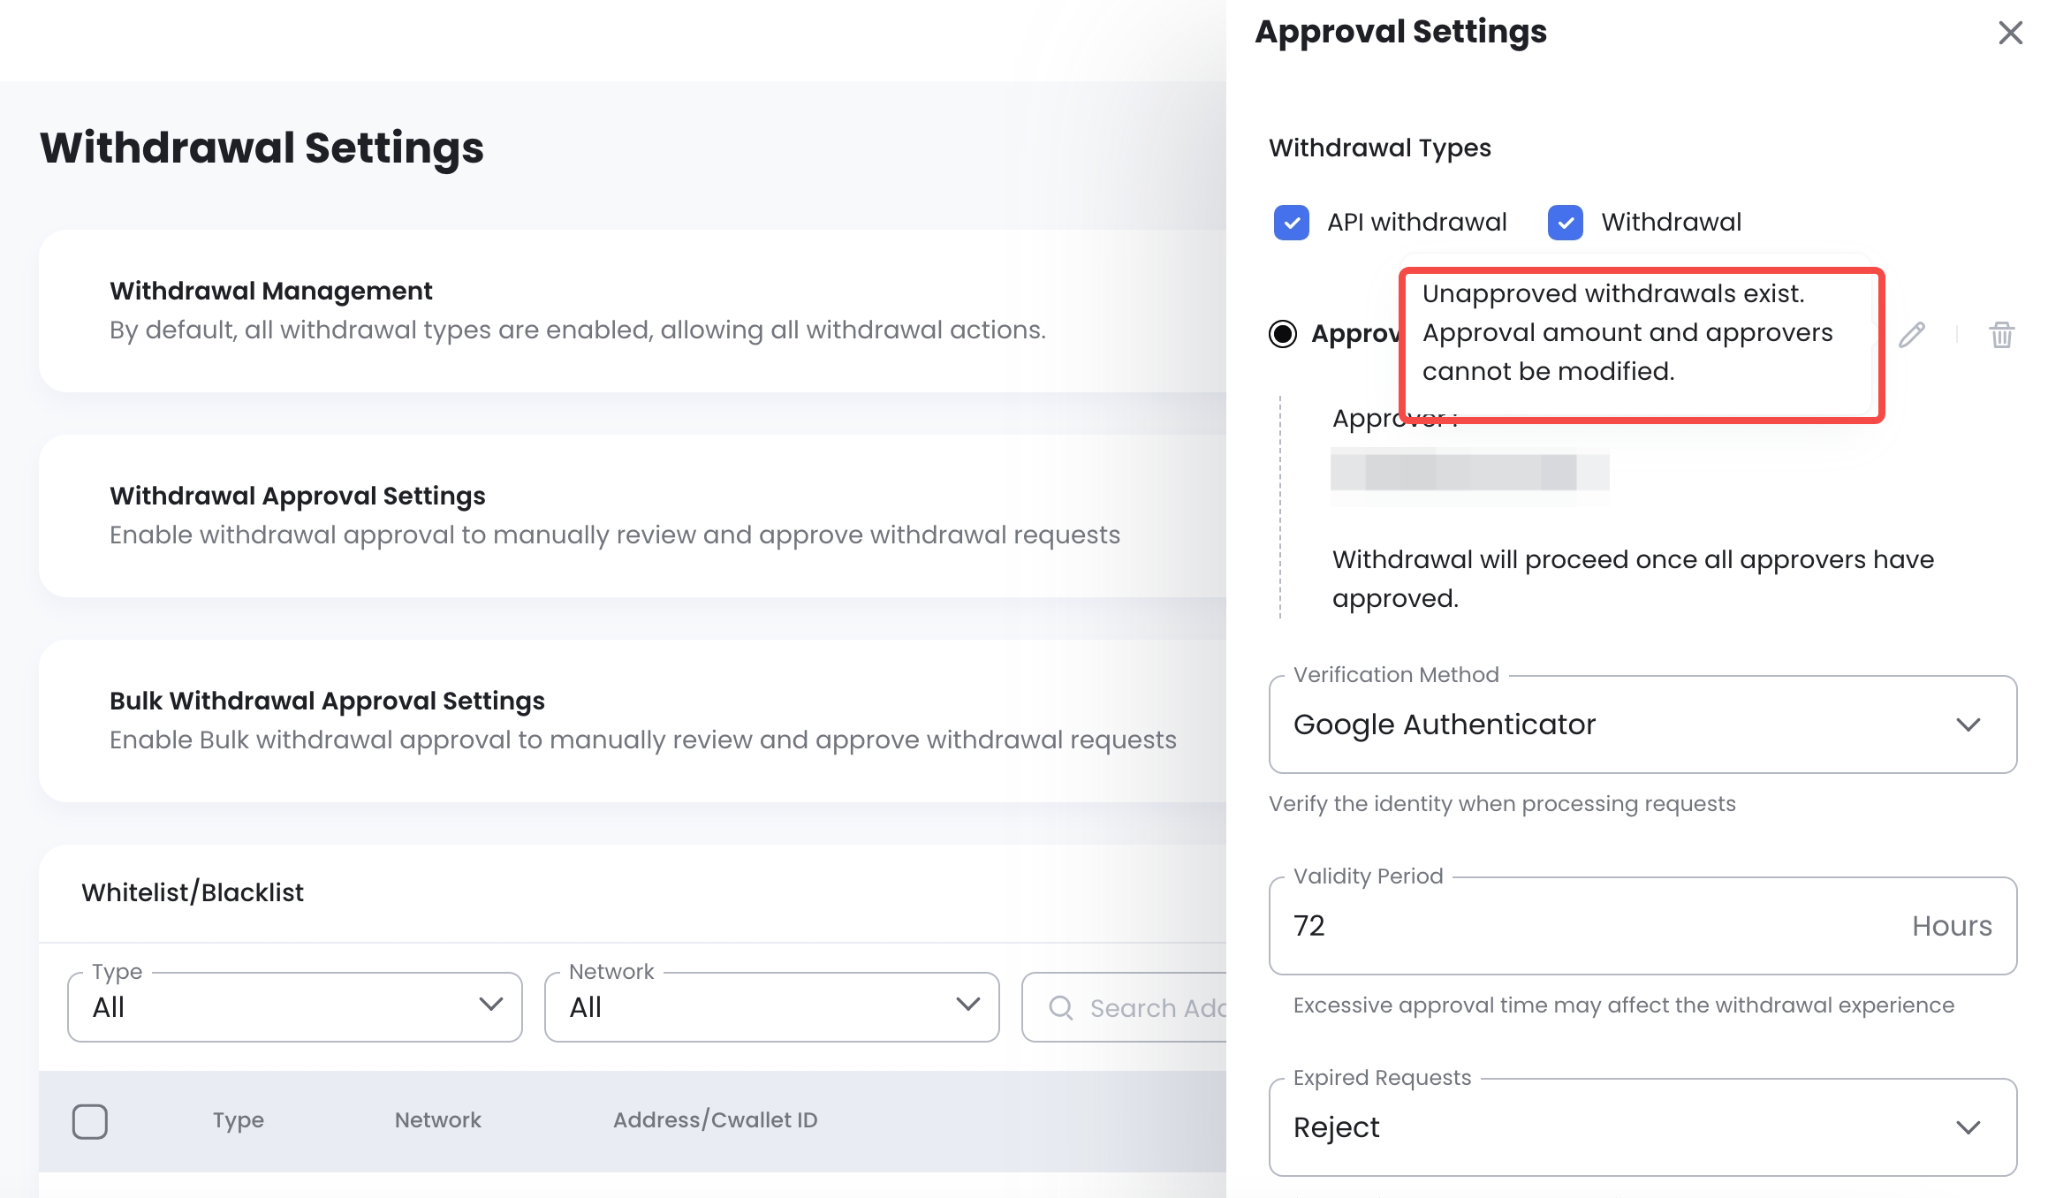
- Verification Method: Select the identity verification method required when processing approval requests.
- Validity Period: Set how long an approval request remains valid. The validity period is measured in hours.
- Expired Requests: Choose whether requests that are not processed within the validity period should be automatically approved or rejected.
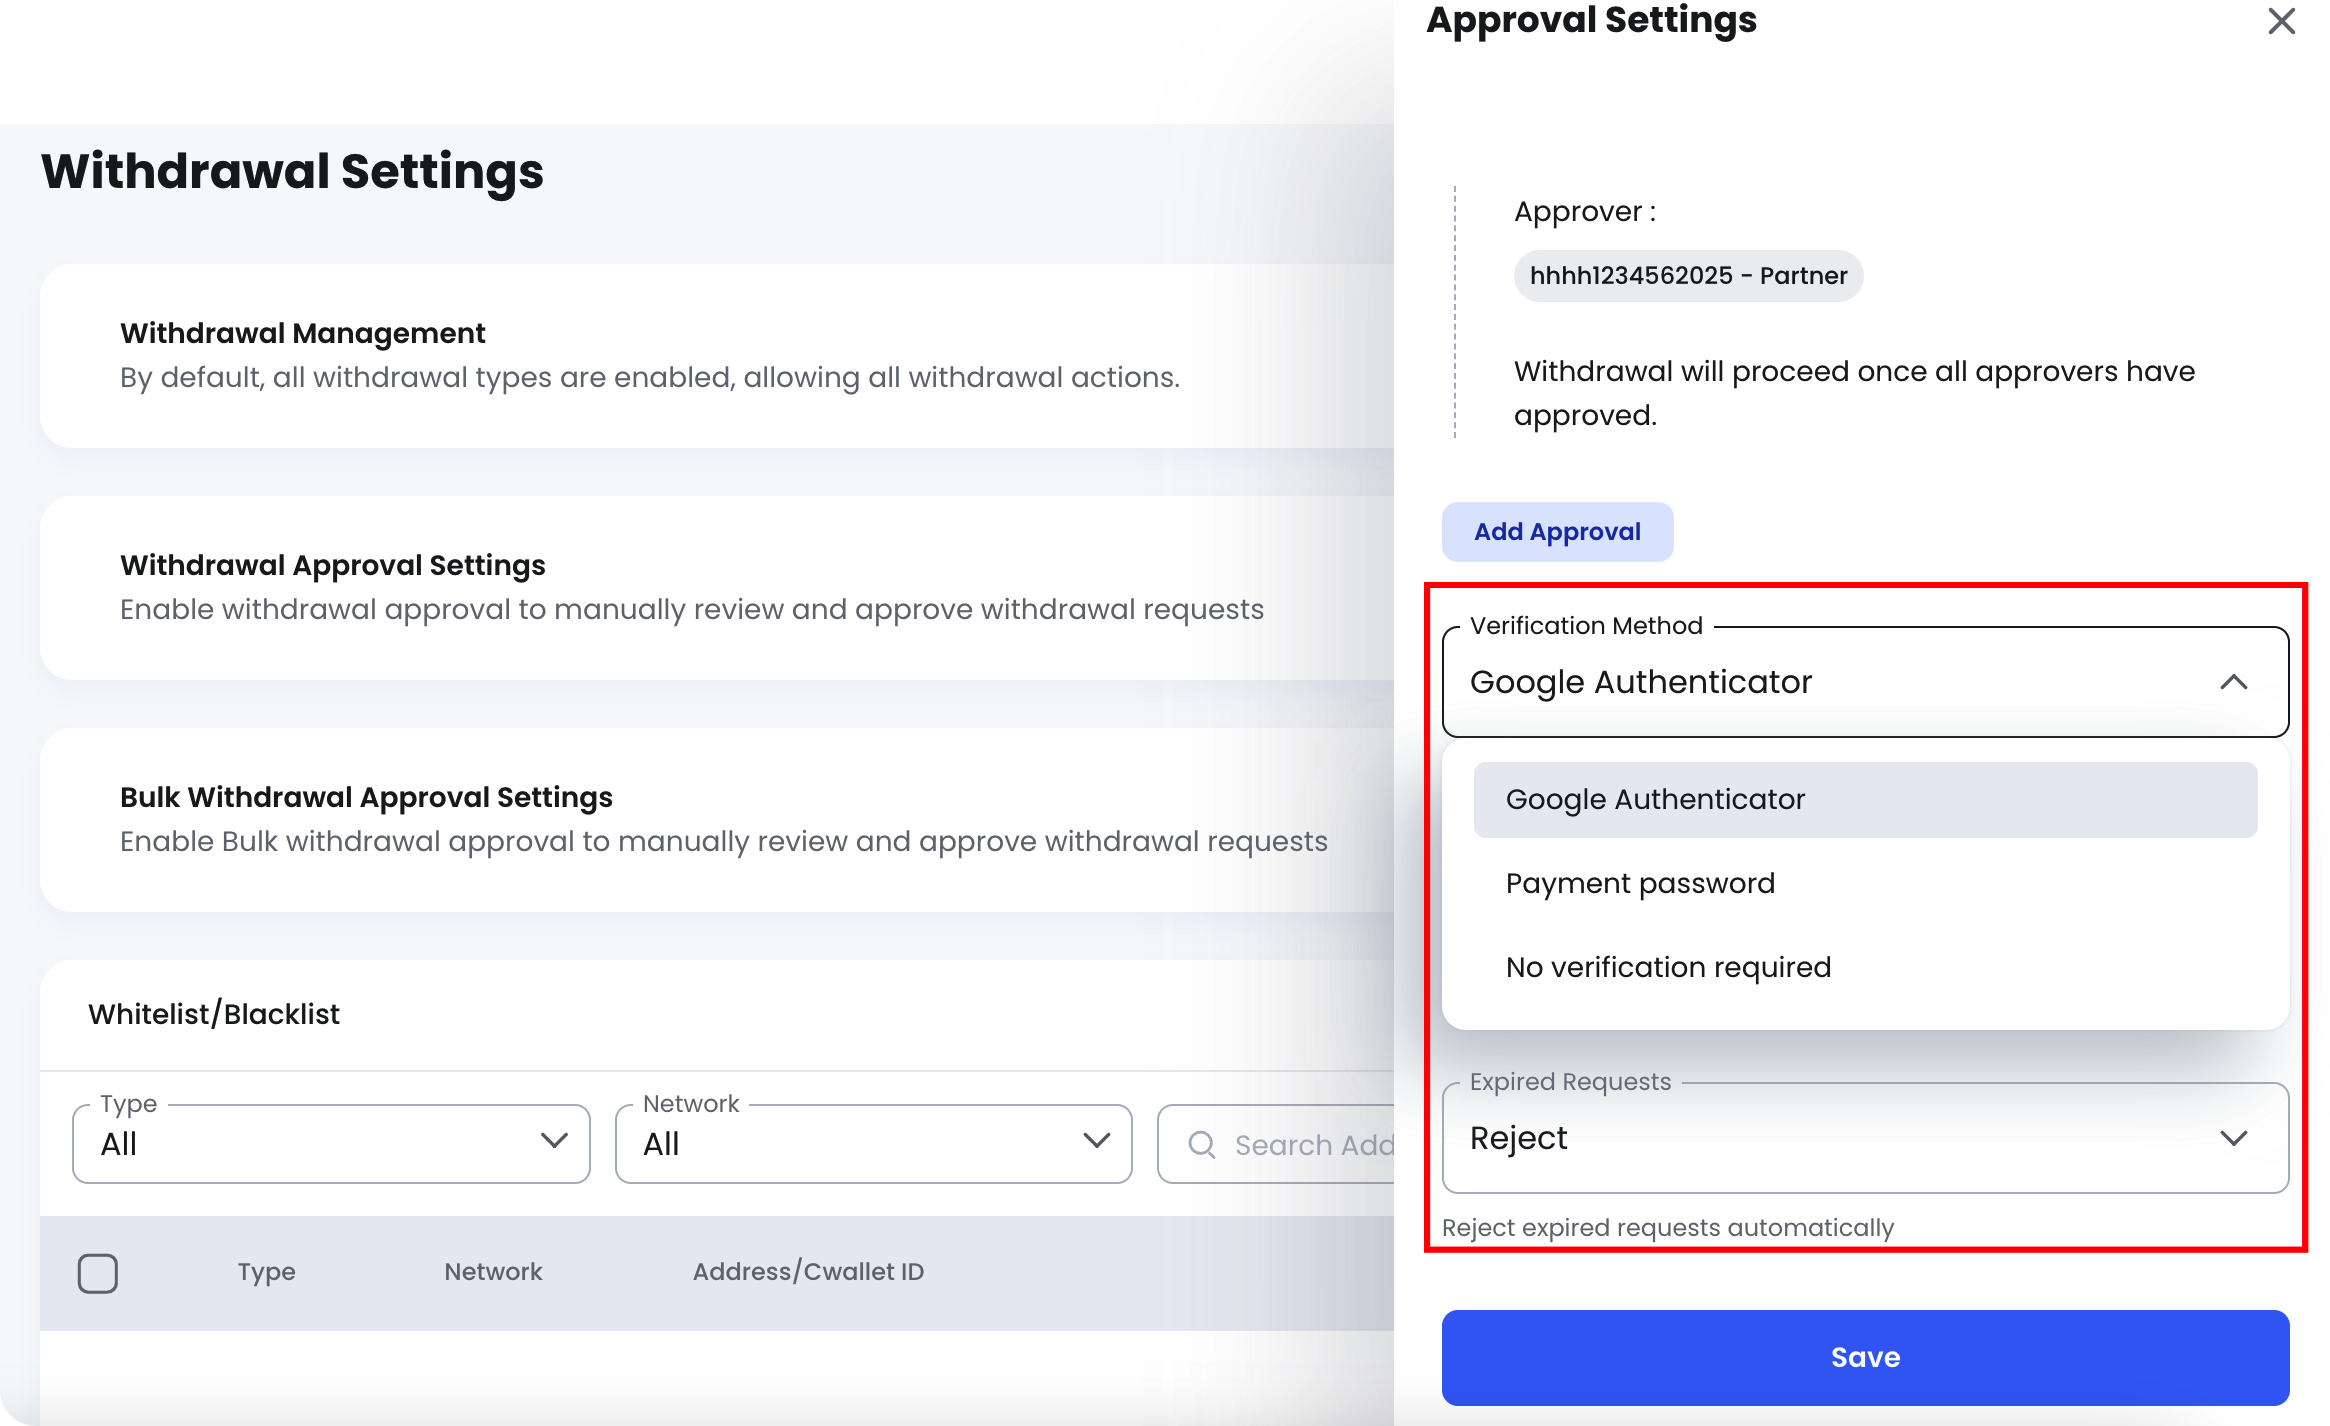
Review the automatic action for expired requests carefully, then click Save.
Note: If unapproved withdrawal requests exist, the approval thresholds and approvers cannot be modified. Process the pending requests before changing these settings.
Step 6: Approve or Reject a Withdrawal Request
Withdrawal requests that require approval appear under Withdrawal Approval → Pending Approvals.
The page contains two tabs:
- Single Withdrawal
- API Bulk Withdrawal
Search by Record ID or address, or select My Pending Approvals to view requests awaiting your action.
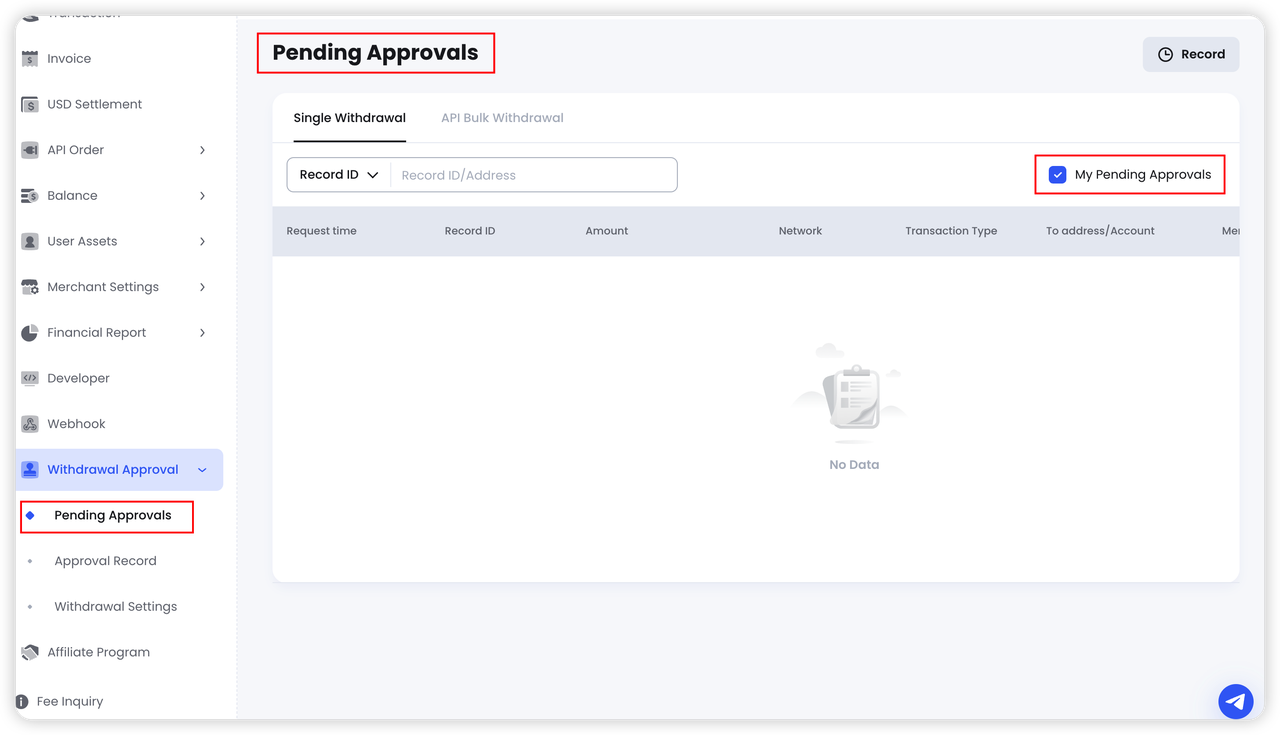
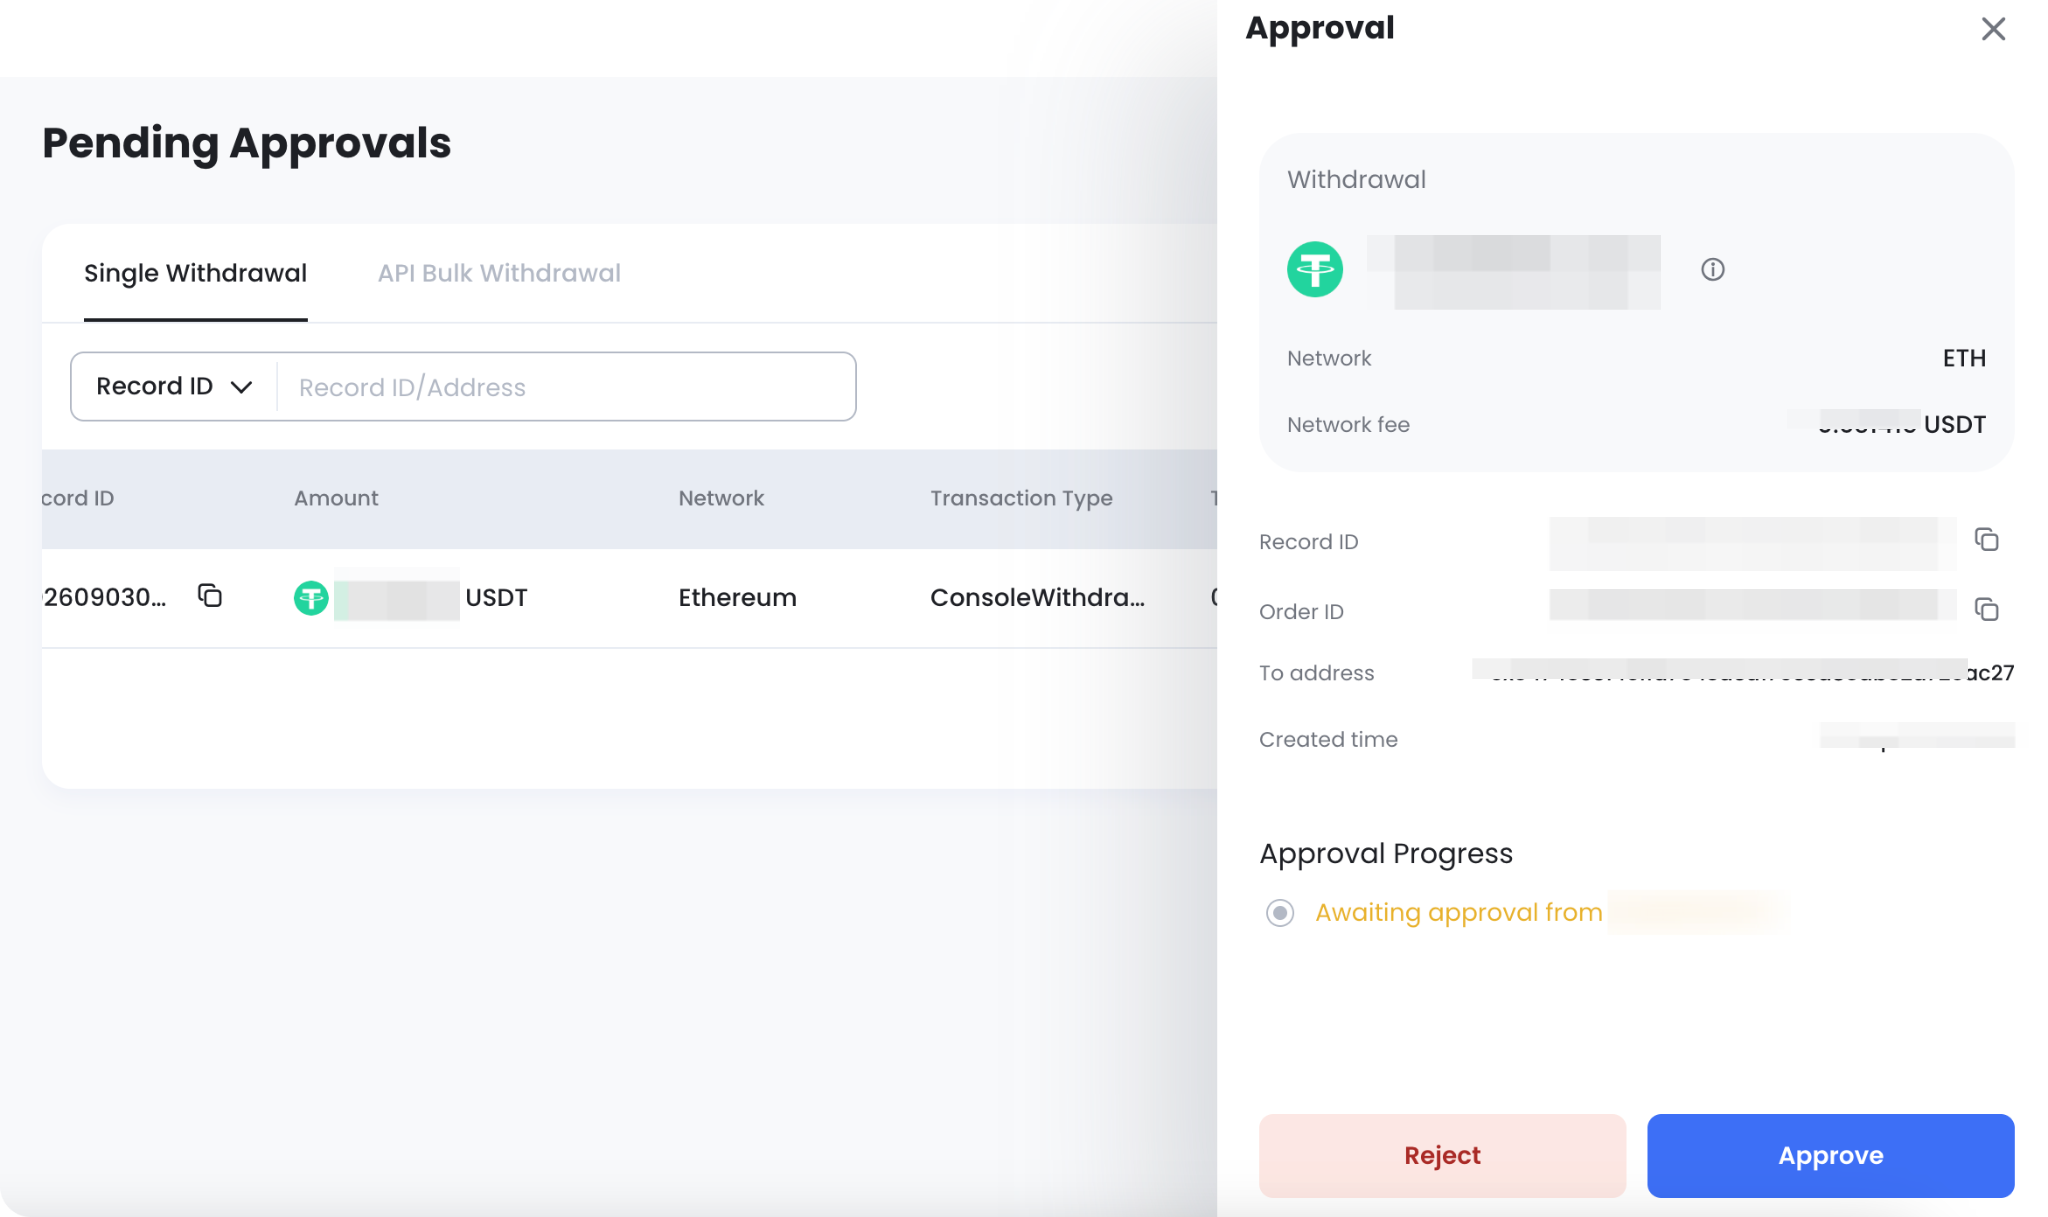
Locate the request and click Approval to open the approval panel.
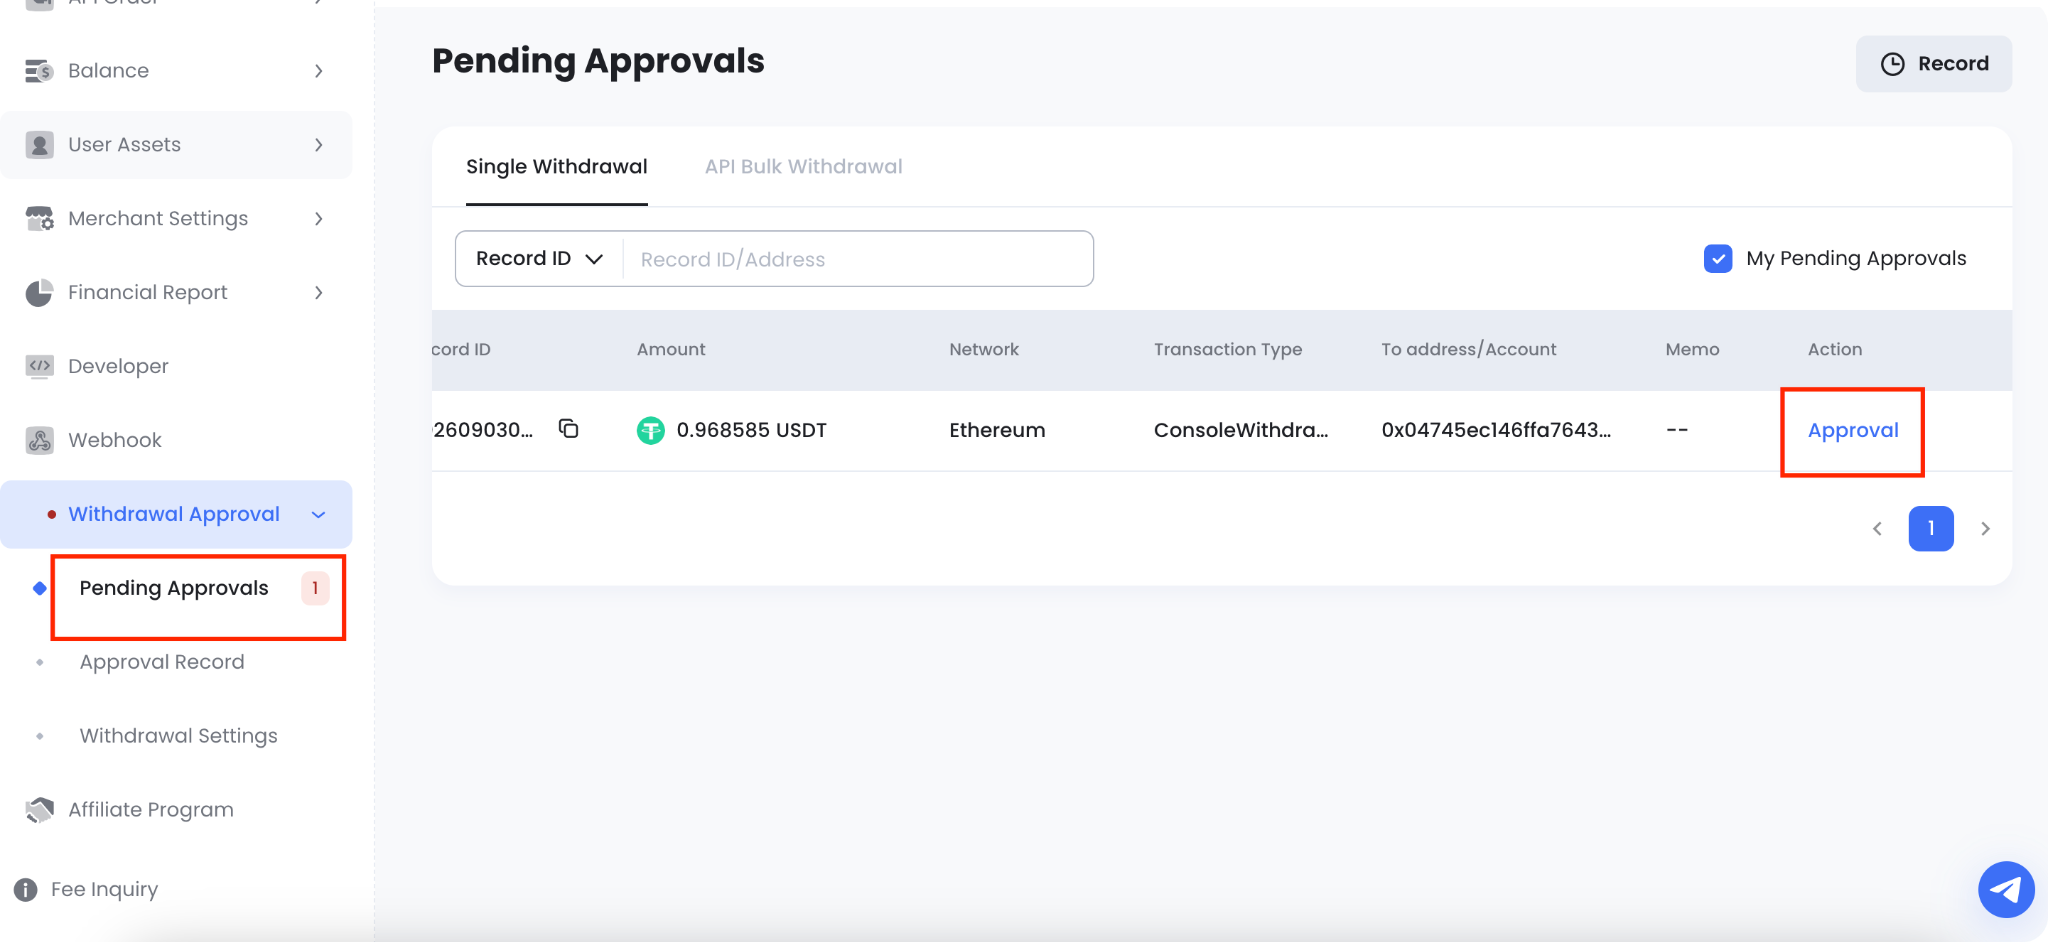
Note: Under tier-approval withdrawal, you can only approve or reject a request after it has been approved by a Tier 1 approver. Otherwise, only the details will be displayed.
Review the withdrawal details and approval progress. Then:
- Click Approve to approve the request.
- Click Reject to reject the request.
Step 7: View Approval Records
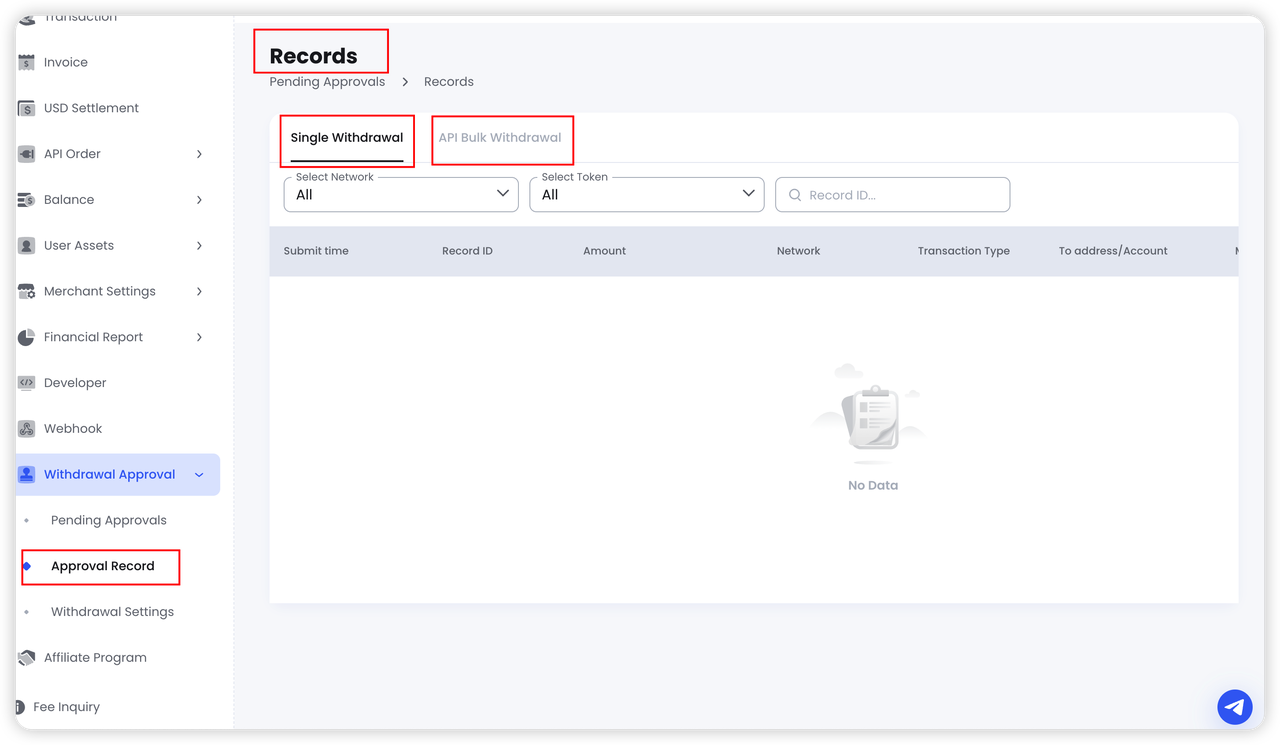
Go to Withdrawal Approval → Approval Record, or click Record on the Pending Approvals page, to view processed approval requests.
The record page contains separate tabs for:
- Single Withdrawal
- API Bulk Withdrawal
You can filter the records by network and token or search by Record ID. Each record displays information such as the amount, network, transaction type, destination address or account, status, and approval details.
Click Detail to view the complete approval record.
To check the subsequent processing status of an approved withdrawal, view the corresponding withdrawal transaction under Transaction.